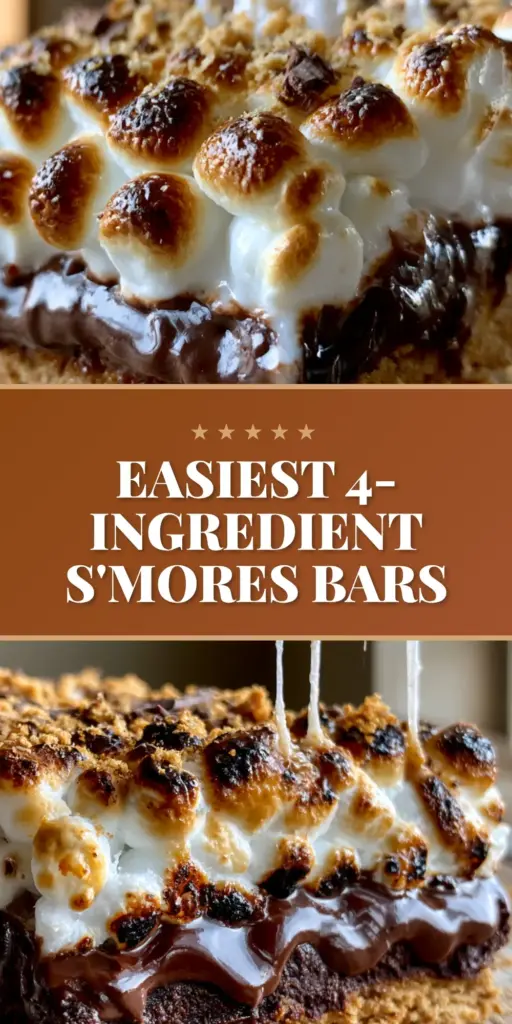
There is a specific kind of magic found in the perfect s’mores bars. It is the moment when the sticky white strands of marshmallow stretch toward the ceiling as you lift a square from the tray. It is the contrast between a buttery, sandy graham cracker base and the deep, dark sheen of a semi-melted chocolate ganache. This isn’t just a dessert; it is a handheld sensory experience designed to evoke the nostalgia of a summer night without the need for an open flame.
Our s’mores bars capture the essence of a campfire with precision and culinary finesse. By focusing on a “marshmallow bridge”—that glistening, stretchy connection between the bar and the tray—and achieving perfectly charred tops, we elevate a humble pantry staple into a gourmet masterpiece. Whether you are prepping for a backyard BBQ or looking for no-bake fourth of july desserts alternatives that actually deliver on texture, this recipe is your definitive guide.
In this deep dive, we will explore the science of the “pressed crumb,” the secrets to a glossy chocolate layer that doesn’t crack, and the specific broiler techniques required to get those iconic charred peaks. Let’s build the ultimate s’mores bars from the crust up.
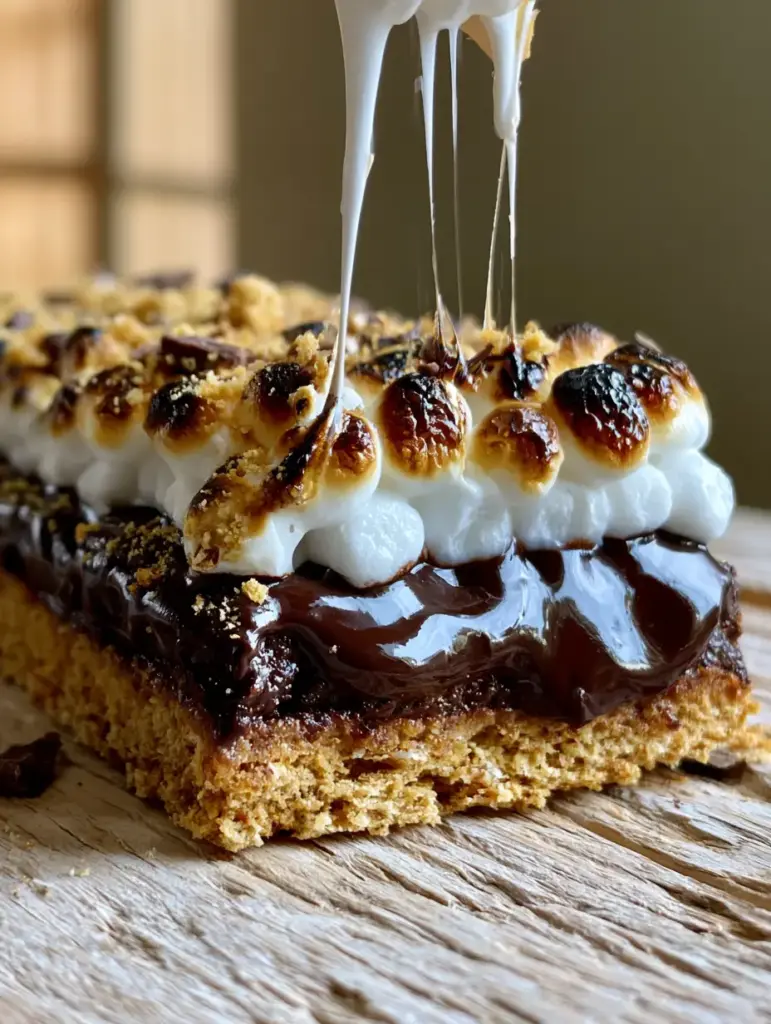
Why These Gooey S’mores Bars Stand Out from the Crowd
- The Structural Crust: We use a high ratio of melted salted butter to ensure the graham cracker base is “pressed” and firm, preventing the bar from crumbling when handled.
- Glossy Ganache Middle: Instead of a hard chocolate bar, we utilize semi-sweet chips to create a thick, glossy, semi-melted layer that stays soft at room temperature.
- The Charred Aesthetic: Using a precision broiling technique, we achieve the “charred golden-brown” tops seen in professional food photography.
- The Sticky Bridge: Our layering method ensures a dense carpet of mini marshmallows that create those iconic white strands when pulled apart.
The Anatomy of the Perfect Graham Cracker Foundation
The base of any elite s’mores bars is the crust. If the crust is too dry, the bar falls apart; if it’s too greasy, it loses that “golden-brown” rustic appeal. We utilize 2 cups (200g) of finely pressed golden graham cracker crumbs to create a stable stage for our toppings.
Melted salted butter acts as the primary binding agent. The salt in the butter is non-negotiable—it cuts through the intense sweetness of the marshmallow and chocolate, providing a sophisticated flavor profile. When you press the crumbs into the pan, you are looking for a “visible coarse crumb” texture that still feels like wet sand.
For a variation on the texture, some bakers prefer smores cookie bars which use a dough-based bottom, but for the classic, authentic crunch, the pressed crumb method is scientifically superior for supporting a heavy chocolate ganache.
Essential Ingredients for the Signature S’mores Bars Layers
Graham Cracker Crumbs (2 cups / 200g): These provide the earthy, honey-noted base that defines the s’mores flavor profile. Use a food processor to achieve a uniform “pressed” consistency.
Melted Salted Butter (1/2 cup / 115g): This acts as the “glue” for your crust. The fats coat the flour particles in the cracker, ensuring the base is crisp rather than soggy once the chocolate is added.
Semi-Sweet Chocolate Chips (2 cups / 340g): We choose semi-sweet to balance the sugar in the marshmallows. These melt into a thick, glossy ganache that remains “semi-melted” even after setting.
Mini Marshmallows (4 cups / 200g): A “dense carpet” of mini marshmallows is required to achieve the “sticky marshmallow bridge.” Miniatures melt faster and more evenly than large ones, providing better coverage.
Heavy Cream (2 tbsp / 30ml): A tiny addition to the chocolate chips ensures that the middle layer stays glossy and handheld-soft, preventing the chocolate from snapping when you take a bite.
The Gear: Tools for Culinary Precision
To achieve the “handheld smartphone photo” aesthetic, you need the right equipment. An 8×8 inch (20x20cm) square baking pan is the gold standard for thickness. A smaller pan makes the bars too tall to eat comfortably, while a larger pan results in a thin, uninspired layer.
You will also need parchment paper with a generous overhang. This allow you to lift the entire block of s’mores bars out of the pan, which is essential for getting those clean, photogenic edges. A kitchen torch is optional but highly recommended for fine-tuning the charred marshmallow tops if your oven’s broiler is uneven.
Step-By-Step Guide to Crafting the Ultimate S’mores Bars
Engineering the Golden Graham Cracker Base
Preheat your oven to 350°F (175°C). In a medium bowl, combine the graham cracker crumbs and melted butter. Stir until the mixture looks like wet sand and holds its shape when squeezed in your hand.
Press the mixture firmly into the bottom of your lined pan. Use the bottom of a flat measuring cup to ensure the crust is level and packed tight. Bake for 8-10 minutes until it turns a deep golden-brown and smells toasted. This “par-baking” step is what prevents a soggy bottom.
Creating the Glossy Chocolate Ganache Middle
While the crust cools slightly, melt your chocolate chips and heavy cream in a double boiler or in 30-second intervals in the microwave. Stir gently until you have a thick, glossy, semi-melted dark chocolate consistency.
Pour the chocolate over the warm crust, spreading it to the very edges. The residual heat from the crust will help the chocolate “bond” to the base, ensuring the layers don’t separate when the s’mores bars are lifted from the rustic wood surface later.
Achieving the Charred Marshmallow Carpet
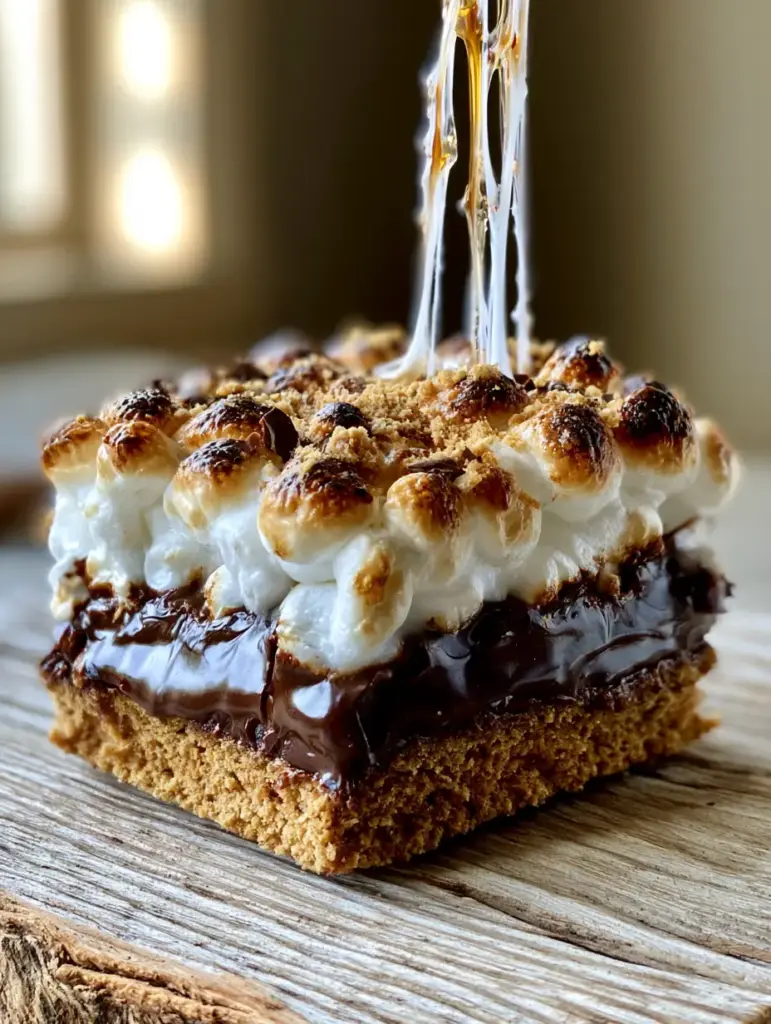
Switch your oven to the Broil setting. Immediately cover the chocolate layer with a dense, overlapping carpet of mini marshmallows. You should not be able to see any chocolate peeking through the white marshmallow layer.
Place the pan under the broiler for 60-90 seconds. Do not walk away! Watch for the marshmallows to puff up and transform into a charred golden-brown. You are looking for those “sticky, glistening white strands” to start bubbling at the edges.
The Final Flourish: Texture and Garnish
Once removed from the heat, immediately sprinkle a few reserved graham cracker crumbs and a dusting of tiny chocolate shavings on top. This adds the “faint dusting” seen in high-resolution food photography and provides a hint of what’s inside the bar.
Allow the bars to set at room temperature for at least 30 minutes. If you cut them too soon, the “marshmallow bridge” will be a mess; if you wait too long, you lose the “semi-melted” chocolate appeal. The sweet spot is when the pan is still slightly warm to the touch.
Expert Tips for the Perfect Marshmallow Pull
- The Wet Knife Trick: When cutting these gooey s’mores bars, dip your knife in hot water and wipe it clean between every single cut. This prevents the marshmallow from tearing and keeps the “glossy ganache” layers distinct.
- Don’t Over-Broil: Marshmallows can go from golden-brown to a fire hazard in three seconds. Use the middle rack of the oven for more control over the char.
- Salt is Key: If you find the bars too sweet, add a tiny pinch of flaky sea salt on top of the chocolate before adding the marshmallows.
- Storage Wisdom: Never refrigerate these! Cold air turns the “sticky white strands” into rubber. Keep them in an airtight container at room temperature.
The Science of the “Marshmallow Bridge”
Why do some s’mores bars have that incredible stretch while others are dry? It comes down to the “marshmallow bridge.” This occurs when the sugar in the marshmallow reaches a specific temperature—just past the melting point but before it begins to caramelize into a hard shell.
By layering the marshmallows over the warm chocolate ganache, the bottom of the marshmallow stays fluid while the top undergoes the Maillard reaction under the broiler. This temperature gradient is what creates the “sticky, glistening white strands” that stretch upward when the bar is pulled.
What to Serve with S’mores Bars at Your Next Cookout
These bars are rich and decadent, making them the perfect centerpiece for a summer spread. To balance the sweetness, pair them with a bright, acidic side dish like a cucumber chickpea feta salad or a refreshing watermelon feta salad.
If you are hosting a larger party and want a variety of handheld treats, consider adding mini fruit pizzas to the dessert table. The tart fruit provides a necessary counterpoint to the deep dark chocolate of the s’mores bars. For a savory contrast, a classic corn salad or frito corn salad works beautifully to round out the meal.
Frequently Asked Questions About Homemade S’mores Bars
While you can, mini marshmallows are preferred because they create a ‘dense carpet’ that melts more evenly. If using large ones, cut them in half and place them cut-side down to ensure they don’t roll around and provide full coverage for that sticky bridge.
Your oven’s broiler is the best tool for this. Place the bars on the middle rack and watch closely for 60-90 seconds. For a more precise ‘handheld photo’ look, you can also use a kitchen torch to char individual marshmallow peaks.
The secret is the ‘pressed’ crust. Use a flat-bottomed cup to pack the graham cracker crumbs and butter tightly. Additionally, let the bars set for at least 30 minutes so the chocolate ganache can firm up slightly before slicing.
No. Refrigeration will make the graham cracker crust soggy and the marshmallows rubbery. Store them in an airtight container at room temperature for up to 3 days to maintain the perfect gooey texture.
A cracking chocolate layer happens when the chocolate is too cold or set too hard. By adding a small amount of heavy cream to the semi-sweet chips, you create a glossy ganache that remains soft and semi-melted at room temperature.
The Ultimate Gooey S’mores Bars Recipe
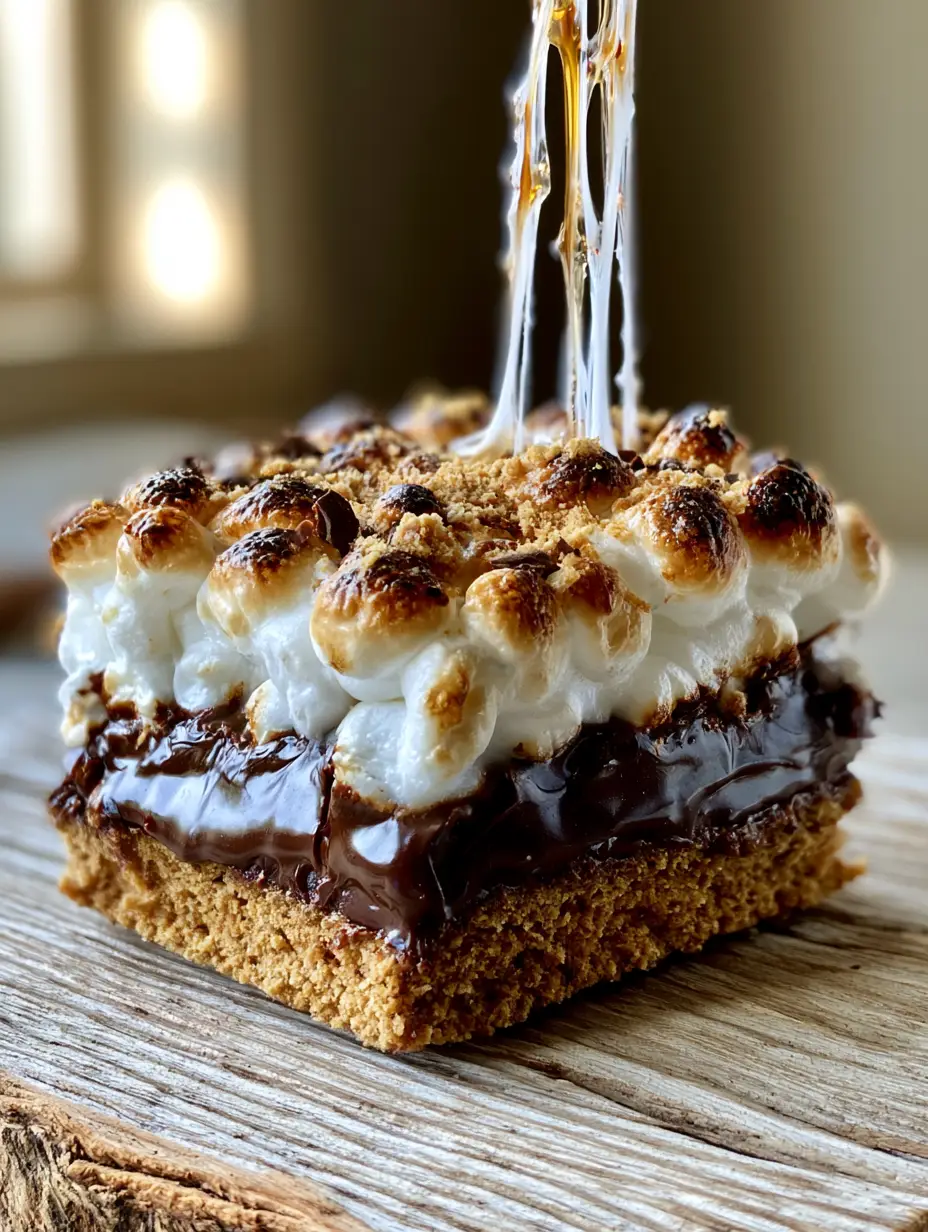
S'mores Bars: The Ultimate Gooey Campfire Treat with a Glossy Ganache
Ingredients
Equipment
Method
- Combine graham cracker crumbs and melted salted butter in a bowl until it resembles wet sand.
- Press firmly into an 8x8 pan. Bake at 350°F (175°C) for 8-10 minutes until deep golden-brown with visible coarse crumbs.
- Melt chocolate chips with heavy cream in 30-second intervals until thick and glossy.
- Pour over the warm crust, spreading evenly to create a semi-melted ganache layer.
- Top with a dense carpet of mini marshmallows.
- Broil for 60-90 seconds until charred golden-brown with glistening white strands.
- Dust with chocolate shavings and extra crumbs while still sticky.
Notes
Do not refrigerate, as it ruins the stretchy marshmallow texture.
Bring the Campfire Home Today
There is no reason to wait for a camping trip to enjoy the charred, chocolatey goodness of a s’more. These s’mores bars offer a sophisticated, reliable way to satisfy that craving with professional results. The combination of the deep golden-brown crust and the glossy ganache middle ensures every bite is a perfect balance of crunch and goo.
If you made these bars and captured that perfect “marshmallow stretch” in a photo, we want to see it! Leave a comment below with your results or share your creations with us on Pinterest. Don’t forget to sign up for our newsletter for more elite dessert engineering and seasonal favorites like classic smore bars variations.