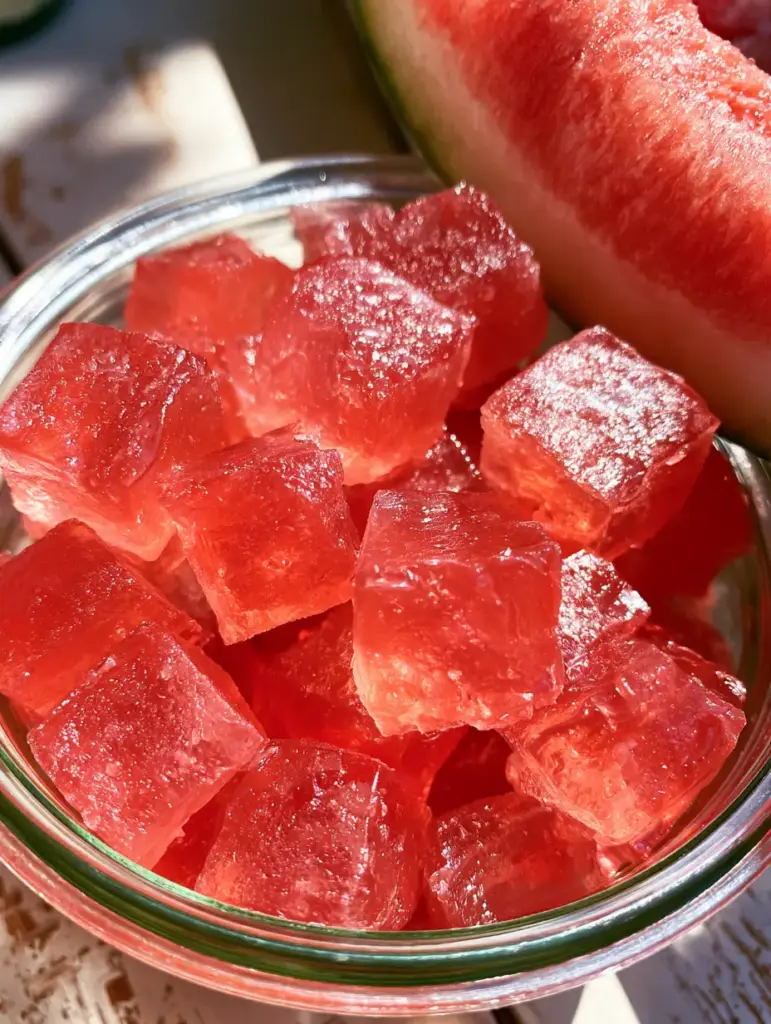
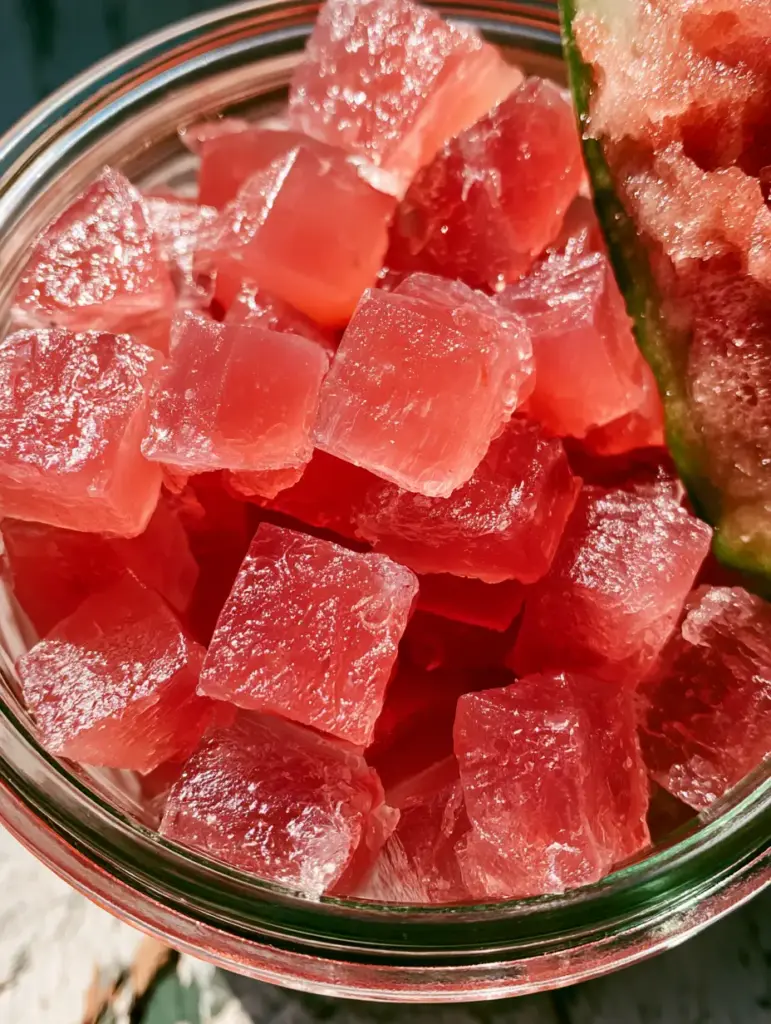
Watermelon Rind Jellies are the culinary world’s best-kept secret for sustainable snacking. Imagine transforming what is usually discarded into translucent, ruby-pink jelly cubes that glow with an internal radiance when caught by the sunlight. These aren’t just candies; they are a masterclass in textures, offering a smooth, slightly tacky bite finished with a glistening sugar coating.
In this guide, we are diving deep into the science of fruit preservation to turn tough rinds into tender, jewel-toned gems. Whether you are looking for a unique gift or a way to honor every part of your summer harvest, these Watermelon Rind Jellies provide a sensory experience that rivals any high-end artisanal confectionary.
By leveraging natural pectin and a controlled sugar-saturation process, we achieve that precise macro-detail look: a firm yet yielding structure that looks like a sunset trapped in glass. Let’s explore how to master this stunning transformation in your own kitchen.
Why You Will Love This Vibrant Zero-Waste Confection
- Stunning Visual Appeal: The translucency of the jellies creates a glowing internal effect that looks professional and high-end.
- Sustainable Sophistication: Turn “trash” into a treasure, utilizing the white rind that most people throw away.
- Perfect Textural Balance: A smooth, tacky interior contrasted by a crunchy, glistening sugar coating.
- Versatile Flavor Profile: The mild rind acts as a canvas for the concentrated watermelon juice and bright citrus notes.
Essential Components for Ruby-Pink Translucency
Fresh Watermelon Rinds: You will need the thick white part of the rind, with the green outer skin carefully peeled away. This structure provides the “jelly” body that becomes translucent when simmered in syrup.
Granulated White Sugar: Sugar acts as the preservative and the structural agent that creates the glistening exterior. You will need 3 cups (600g) for the syrup and extra for the final coating.
Concentrated Watermelon Juice: This is the secret to the ruby-pink hue. By using 1 cup (240ml) of fresh juice, we infuse the white rind with natural pigment and summer flavor.
Fresh Lemon Juice: 2 tbsp (30ml) of acid is scientifically required to balance the sweetness and help the natural pectins set the jelly structure. It also keeps the color vibrant.
Fine Sea Salt: Just a pinch (about 1/4 tsp) is necessary to brighten the fruit notes and prevent the candy from feeling cloyingly sweet.
Cold Water: Used for the initial parboiling process to soften the cellulose fibers of the rind before the sugar infusion begins.
Professional Tools for Precision Candy Making
To achieve the uniform, glistening cubes seen in our visual blueprint, a few specific tools are non-negotiable. A sharp Y-peeler is the most efficient way to remove the tough green skin without wasting the precious white rind underneath. A heavy-bottomed stainless steel saucepan is vital for even heat distribution, preventing the sugar syrup from scorching.
You will also need a digital kitchen scale for precise metric measurements, ensuring the sugar-to-liquid ratio is perfect for shelf stability. Finally, a clear glass mason jar is the ideal vessel for displaying your finished Watermelon Rind Jellies, allowing the soft natural daylight to highlight their ruby-pink glow.
The Step-by-Step Path to Glowing Jelly Cubes
Preparing the Rind Foundation
Start by slicing your watermelon into manageable wedges. Remove the red flesh, leaving about a quarter-inch of pink for color, then use a sharp peeler to strip away every bit of the dark green skin. Cut the remaining white rind into uniform 1-inch (2.5cm) cubes; uniformity is key for even cooking and that clean, modern aesthetic.
The Softening Parboil
Place your cubes in a pot and cover with cold water. Bring to a boil and simmer for about 10–15 minutes until the rind is slightly tender but not mushy. You are looking for a change in opacity—the cubes should start to look less like a vegetable and more like a blank canvas for the syrup.
Infusing the Ruby-Pink Glow
Drain the water and return the cubes to the pot. Add your sugar, watermelon juice, and lemon juice. Simmer over medium-low heat. As the water evaporates, the sugar concentration increases, forcing the ruby-pink syrup into the cells of the rind. Continue until the cubes are completely translucent and the syrup has reached a thick, honey-like consistency.
The Curing and Tacky Texture Phase
Remove the cubes with a slotted spoon and place them on a wire cooling rack set over parchment paper. This is the “tacky” phase described in our visual prompt. Let them air dry for at least 12 to 24 hours in a cool, dry place. The surface must feel sticky to the touch but not wet before you move to the final step.
Achieving the Glistening Sugar Coating
Once tacky, toss the cubes in a bowl of extra granulated sugar. The crystals will adhere to the smooth surface, creating that glistening, light-reflecting crust. Work in small batches to ensure every side of the ruby-pink jelly is perfectly coated. If you enjoy this process, you might also like experimenting with watermelon fries for another unique texture.
Pro Tips for Artisan-Level Results
- Monitor the Translucency: If your rinds still look white in the center, they haven’t absorbed enough syrup; add a splash more water and continue simmering.
- Control the Humidity: Candy making is sensitive to moisture. If it’s a humid day, use a food dehydrator on the lowest setting to achieve the desired tacky texture.
- Color Enhancement: For a deeper “ruby” tone, you can add a single hibiscus tea bag to the simmering syrup, which provides a natural, vibrant red boost.
- Slicing Precision: Use a ruler if necessary to keep your cubes at exactly 1-inch (2.5cm) for that clean, modern glass jar presentation.
Preserving Your Watermelon Rind Jellies
Because of the high sugar content and the acidity from the lemon juice, these jellies are quite shelf-stable. Store them in a clear glass mason jar at room temperature for up to two weeks. Keep the jar in a cool, dark spot to maintain that translucent ruby-pink color, as direct sunlight over long periods can eventually fade natural pigments.
For longer storage, you can keep them in the refrigerator for up to a month. However, note that the sugar coating may eventually dissolve into the jelly in the fridge due to moisture. If this happens, simply re-roll them in sugar before serving to restore the glistening effect. For more preservation ideas, check out our watermelon canning recipes.
Creative Ways to Serve and Pair
These jellies are more than just a snack; they are a versatile garnish. Perch a ruby-pink cube on the rim of a summer cocktail, or use them as a surprising topper for a fruit pizza. The sweetness of the jelly pairs beautifully with the salty profile of a watermelon feta salad, providing a concentrated burst of flavor.
If you are hosting a summer gathering, these jellies make an excellent addition to a dessert charcuterie board alongside smore bars and other handheld treats. Their unique appearance always sparks conversation about zero-waste cooking and innovative leftover watermelon recipes.
Common Questions About This Recipe
It is best to remove the green skin. The outer skin is very tough and waxy; it won’t soften properly or become translucent, resulting in an unpleasant texture compared to the tender white rind.
No, watermelon rind contains natural pectin, and the high sugar concentration combined with lemon juice provides enough structural integrity to create a firm, jelly-like cube without additives.
The color comes from simmering the white rind in concentrated fresh watermelon juice. For an even deeper glow, you can add a natural colorant like hibiscus or a drop of beet juice to the syrup.
If the jellies remain opaque, they haven’t simmered long enough to fully absorb the sugar syrup. Continue cooking on low heat, adding a tablespoon of water if the syrup gets too thick before the centers clear.
Sugar dissolves in the presence of moisture. Ensure your jellies are sufficiently ‘tacky’ and dry (12-24 hours) before rolling, and store them in a cool, dry place rather than a humid refrigerator.
The Master Recipe for Watermelon Rind Jellies
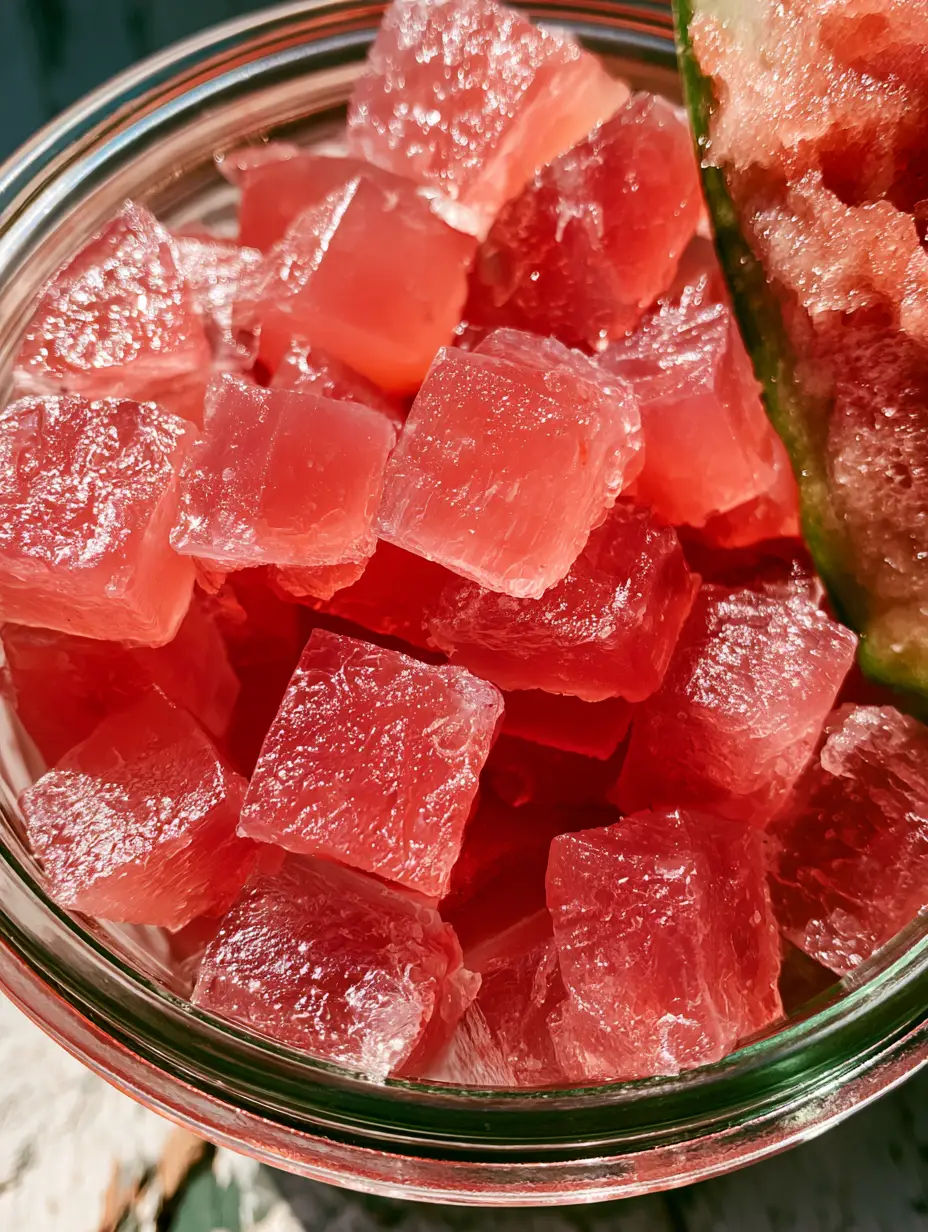
Watermelon Rind Jellies: The Ultimate Zero-Waste Jewel-Toned Candy
Ingredients
Equipment
Method
- Remove the green skin from the watermelon rind and cut the white part into 1-inch cubes.
- Boil cubes in water for 10-15 minutes until slightly tender and transitioning from opaque to semi-translucent.
- Drain water, add sugar, watermelon juice, lemon juice, and salt. Simmer over medium-low heat until the rind is fully translucent and ruby-pink.
- Continue cooking until the syrup is thick and the cubes have absorbed the color, creating a glowing effect.
- Place cubes on a wire rack for 12-24 hours until the surface is smooth and slightly tacky.
- Roll the tacky cubes in granulated sugar until glistening and fully covered.
Notes
Use a food dehydrator on low if your kitchen is humid to ensure they become tacky.
Final Thoughts on This Sweet Transformation
Watermelon Rind Jellies represent the perfect intersection of culinary science and aesthetic beauty. By taking a simple byproduct and applying heat, sugar, and time, you create a confection that is as delicious as it is visually arresting. The glowing, ruby-pink cubes are a testament to what home cooks can achieve with a bit of patience and a lot of imagination.
We invite you to share your results and tag us in your photos! Don’t forget to pin this recipe to your favorite Pinterest boards so you never lose this zero-waste gem. Happy cooking!