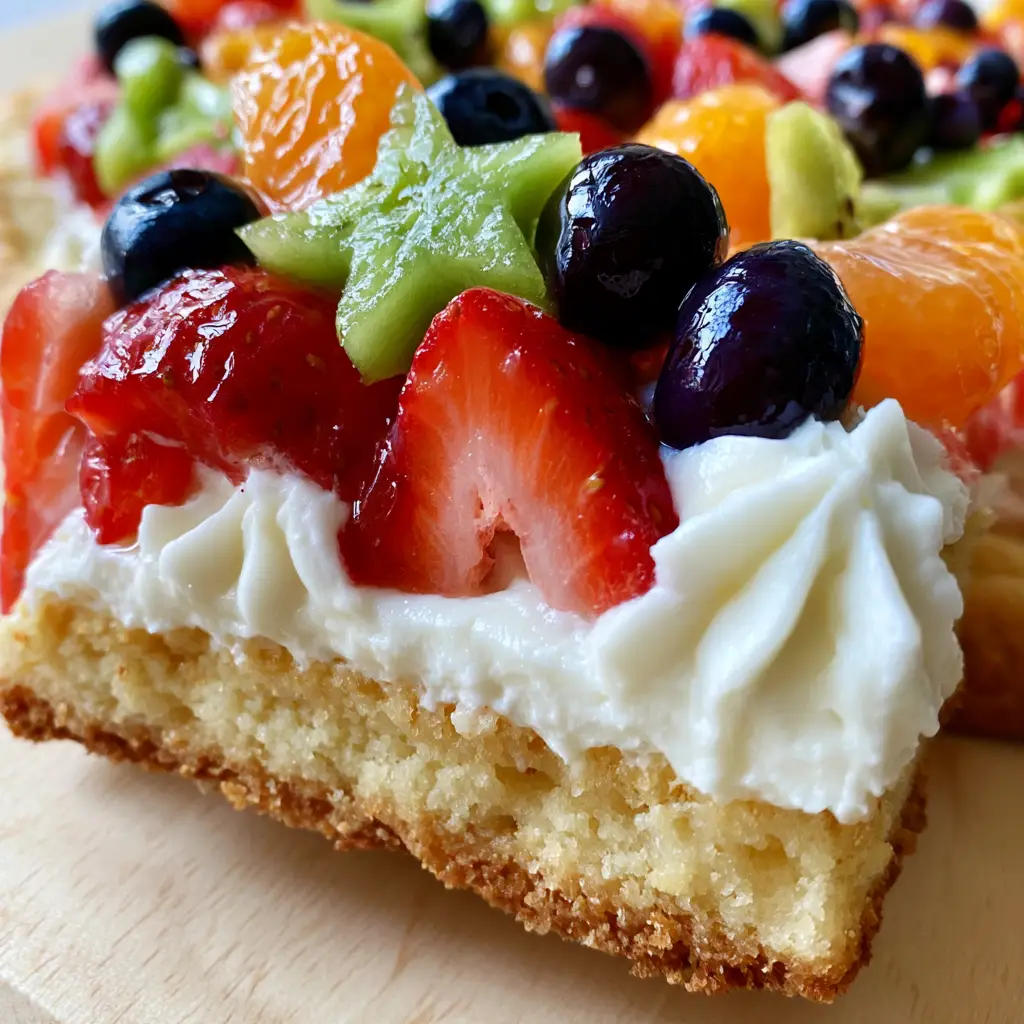
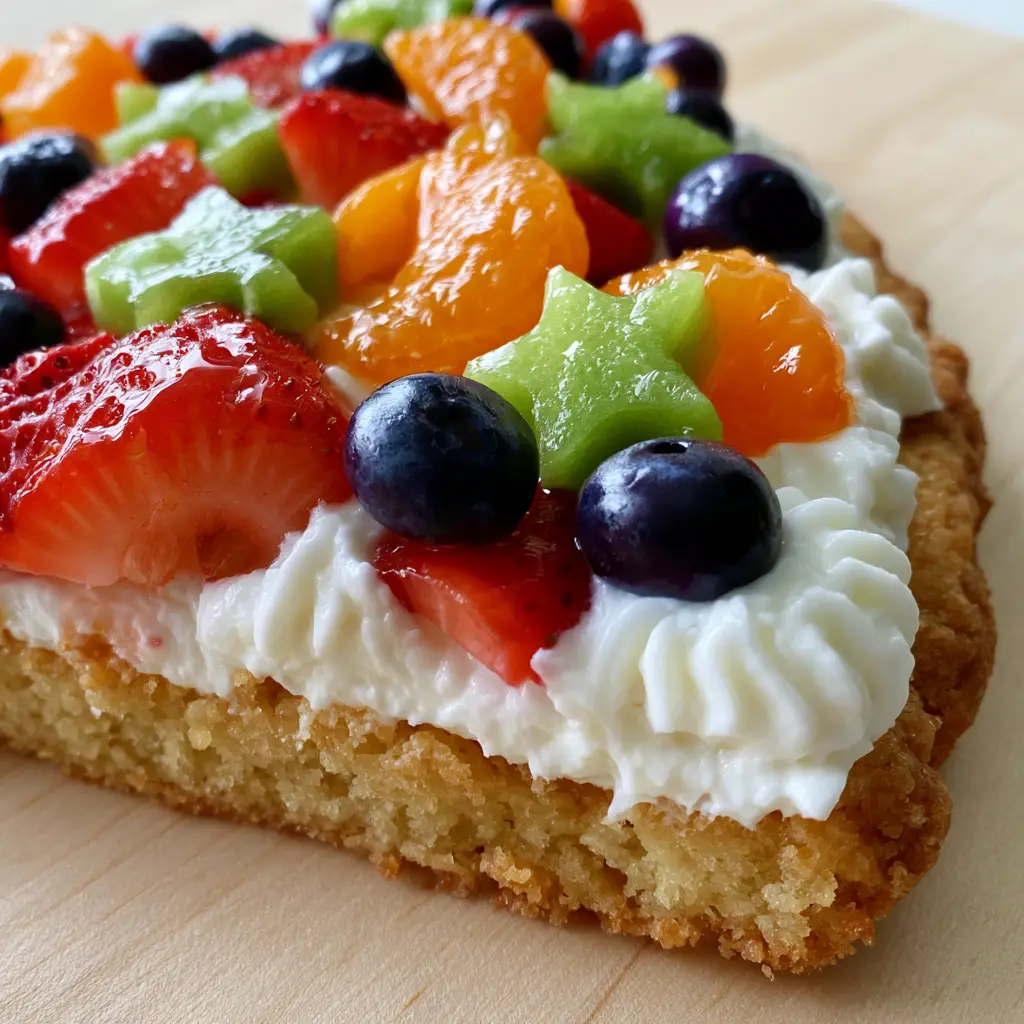
The perfect Fruit Pizza is more than just a dessert; it is a vibrant, edible masterpiece that balances a buttery, shortbread-like crunch with the silky tang of whipped cream. When you lift a slice at a 45-degree angle, you should see a thick, golden-brown crust that holds its shape under a mountain of glistening, fresh fruit. This recipe captures that exact professional aesthetic, featuring piped ridges of frosting and a light apricot glaze for a dewy, high-end finish.
Whether you are hosting a summer garden party or looking for a show-stopping centerpiece for a holiday brunch, this recipe delivers on every sensory promise. The contrast between the ruby-red strawberries, deep purple blueberries, and emerald green kiwi stars makes it almost too beautiful to eat. Almost. This guide will walk you through the culinary science of achieving that perfect “snap” in your cookie base while maintaining a velvety topping.
Why This Is the Only Fruit Pizza Recipe You Need
- Structural Integrity: A thick, sugar cookie base specifically engineered to be sturdy enough to hold heavy fruit toppings without becoming soggy.
- Visual Brilliance: Custom star-shaped kiwi slices and a glossy apricot sheen ensure your dessert looks like it came from a professional patisserie.
- The Frosting Texture: A whipped, stabilized cream cheese frosting that holds piped ridges, even in warmer temperatures.
- Balanced Flavor: Not just sweet—we use a hint of salt and lemon zest to cut through the sugar for a sophisticated palate.
The Anatomy of a Perfect Sugar Cookie Base
To achieve the “golden-brown” and “buttery shortbread” texture mentioned in our visual blueprint, we must focus on the fat-to-flour ratio. Using unsalted butter allows us to control the seasoning precisely, ensuring the crust complements rather than overpowers the fresh fruit.
1 cup (225g) Unsalted Butter, softened: This provides the foundational richness and the characteristic “short” crumb of the crust. Ensure it is at room temperature so it creams perfectly with the sugar.
1 cup (200g) Granulated Sugar: Sugar does more than sweeten; it helps the crust brown through caramelization, giving us that targeted golden hue. It also provides the structural “snap” once the cookie cools.
1 large Egg: The egg acts as the primary emulsifier, binding the fats and flours together to prevent the crust from crumbling when you lift a slice. Use a room-temperature egg for the smoothest dough integration.
2 tsp (10ml) Vanilla Extract: Use a high-quality pure extract to provide a floral, aromatic background that bridges the gap between the buttery crust and the tangy frosting.
2 ½ cups (312g) All-Purpose Flour: This provides the bulk of the structure. Measuring by weight (grams) is highly recommended to ensure the crust isn’t too dry or too soft.
1 tsp (5g) Baking Powder: Just enough to provide a slight lift, ensuring the thick crust isn’t a hard brick but a tender, biteable cookie. This creates the visible crumb texture we want.
½ tsp (3g) Fine Sea Salt: A crucial invisible ingredient that enhances the butter flavor and balances the sweetness of the fruit toppings.
Whipped Cream Cheese Frosting Ingredients
8 oz (225g) Full-Fat Cream Cheese, softened: The base of our “velvety” topping. Always use the block variety, as tub cream cheese contains too much water and won’t hold piped ridges.
½ cup (115g) Unsalted Butter, softened: Mixing butter with the cream cheese creates a more stable frosting that can withstand the weight of mandarin segments and blueberries.
2 cups (240g) Powdered Sugar, sifted: Sifting is mandatory here to achieve that “bright white” and “velvety” appearance without any gritty lumps. Adjust slightly if you prefer a stiffer consistency for piping.
1 cup (240ml) Heavy Whipping Cream, cold: Folding in whipped cream at the end is the secret to the “whipped” and light-as-air texture that makes this Fruit Pizza stand out.
Essential Fruit and Glaze Components
1 lb (450g) Fresh Strawberries: These should be hulled and sliced thinly to create the “glistening ruby-red” layers. Look for berries with deep color all the way to the stem.
1 cup (150g) Fresh Blueberries: Choose plump, dark purple berries. These add a wonderful pop of color and a tart contrast to the sweet cream.
3-4 Fresh Kiwis: To achieve the “star-shaped” look, slice the kiwi into rounds and use a small star-shaped cookie cutter. This technical detail elevates the visual appeal significantly.
1 can (11 oz) Mandarin Orange Segments: If using canned, drain them thoroughly and pat dry with a paper towel. This prevents excess moisture from bleeding into your white frosting.
¼ cup (60ml) Apricot Preserves: Melted and strained, this creates the “light apricot glaze sheen” that protects the fruit and makes it glow under natural light.
The Pro-Kit: Equipment You’ll Need
To get those decorative piped ridges, you will need a large piping bag fitted with a star tip (like an Open Star 1M). An 12-inch pizza pan provides the perfect surface area for the crust, while an offset spatula helps in creating an even layer of frosting before piping the edges.
If you find yourself with extra ingredients after decorating, you can easily repurpose them into mini fruit pizzas by using a smaller round cutter on the cookie dough before baking.
Mastering the Golden Cookie Crust
Step 1: Creaming for Structure
In a large bowl or stand mixer, cream the softened butter and granulated sugar for 3-4 minutes. You are looking for a pale, fluffy texture. This process incorporates air, which works with the baking powder to create that perfect crumb. Add the egg and vanilla, beating until just combined.
Step 2: Incorporating Dry Ingredients
Whisk together the flour, baking powder, and salt. Gradually add the dry mixture to the wet ingredients on low speed. Stop the moment the flour disappears. Over-mixing will develop gluten, turning your shortbread-like crust into something tough and bread-like.
Step 3: The Perfect Bake
Press the dough evenly into a greased 12-inch pizza pan. Chill the dough in the pan for 15 minutes before baking; this prevents the edges from shrinking. Bake at 350°F (175°C) for 12-15 minutes. Visual Cue: Look for the edges to be a light golden-brown while the center remains pale but set. Let it cool completely on a wire rack.
Creating the Velvety Whipped Frosting
Step 4: The Cream Cheese Base
Beat the cream cheese and butter until smooth and lump-free. Gradually add the powdered sugar. In a separate cold bowl, whip the heavy cream to stiff peaks. Gently fold the whipped cream into the cream cheese mixture. This creates the “thick, velvety” texture that is light enough to eat by the slice but firm enough for piping.
Step 5: Piping the Ridges
Spread a thin layer of frosting over the cooled crust, leaving a ½ inch border. Fill your piping bag with the remaining frosting and pipe a decorative border around the edge. This helps “frame” the fruit and creates the professional look seen in high-quality food photography.
The Art of the Fruit Topping
Step 6: Preparing the Fruit
Slice your strawberries and kiwis. For the kiwis, use your star cutter on the widest slices. Ensure all fruit is patted dry. If you enjoy this flavor profile but want something a bit different for your next gathering, consider a peanut butter chocolate chip cookie pizza as a decadent alternative.
Step 7: The Glistening Glaze
Arrange the fruit in concentric circles, starting from the outside and moving in. Place your kiwi stars prominently. Heat the apricot preserves with a splash of water until liquid, then strain out any chunks. Use a pastry brush to lightly dab the glaze over the fruit. This provides that “dewy sheen” and prevents the fruit from drying out.
Expert Tips for Fruit Pizza Success
- Temperature Control: Never frost a warm cookie. The residual heat will melt the fat in the frosting, causing your piped ridges to collapse into a puddle.
- Moisture Management: If using very juicy fruit, wait to assemble until 1-2 hours before serving. This keeps the crust crisp.
- The “Dewy” Secret: The apricot glaze isn’t just for looks; the acidity in the preserves helps prevent the sliced strawberries from oxidizing and turning brown.
- The Lift Test: If the crust feels too soft to lift, chill the entire pizza for 30 minutes. The butter in the crust will firm up, providing that sturdy shortbread feel.
Serving and Storage Recommendations
This Fruit Pizza is best served chilled. Use a sharp pizza cutter or a chef’s knife to create clean, triangular slices. For the best presentation, wipe the blade between each cut.
Storage: Store leftovers in an airtight container in the refrigerator for up to 2 days. The crust will soften slightly over time as it absorbs moisture from the frosting. This recipe is part of our collection of no-bake fourth of July desserts and summer treats that emphasize fresh produce.
Freezing: You can freeze the baked cookie crust (wrapped tightly) for up to 3 months. However, the assembled pizza with fruit and frosting does not freeze well due to the water content in the berries.
What to Serve with Your Summer Dessert
Since this is a bright and fresh dessert, it pairs wonderfully with savory summer salads. Try serving it alongside a creamy corn salad or a refreshing watermelon feta salad. The contrast between the salty feta and the sweet fruit pizza creates a perfect party menu balance.
If you’re hosting a large BBQ, it also complements hearty sides like bacon and corn salad or a zesty chickpea feta avocado salad. For those who love the combination of fruit and greens, a summer peach salad is the ultimate companion to this fruit-focused pizza.
Frequently Asked Questions
Yes, you can bake the crust up to 48 hours in advance. Store it at room temperature, wrapped tightly in plastic wrap, to maintain its crisp texture.
You can, but it is often thinner and sweeter than this scratch-made version. To achieve the thick, shortbread-like crumb shown here, we recommend the homemade recipe provided.
Ensure all fruit is thoroughly patted dry after washing and slicing. Applying the apricot glaze also acts as a light barrier, but for best results, assemble no more than 4 hours before serving.
While optional for flavor, the glaze provides the professional ‘dewy sheen’ and helps preserve the color of the fruit, especially the strawberries, by preventing oxidation.
Slice the kiwi into rounds first, then use a small metal star-shaped cookie cutter to punch out the center. This creates the professional ‘star kiwi’ look seen in high-end food photography.
The Ultimate Fruit Pizza Recipe Card
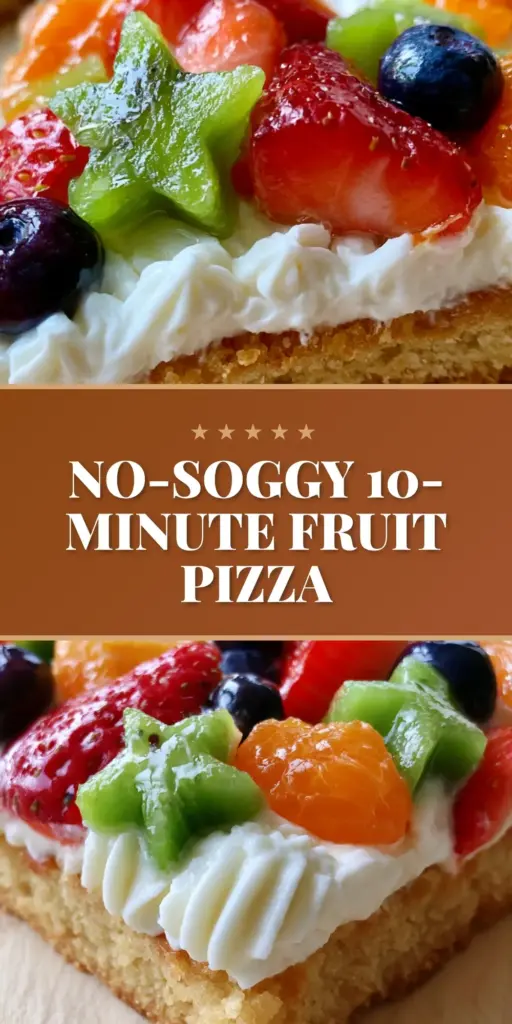
Fruit Pizza with a Thick Golden Sugar Cookie Crust and Whipped Frosting
Ingredients
Equipment
Method
- Cream softened butter and granulated sugar until fluffy, about 3-4 minutes. Beat in the egg and vanilla.
- Whisk flour, baking powder, and salt. Add to wet ingredients on low speed until just combined.
- Press dough into a 12-inch pizza pan and chill for 15 minutes. Bake at 350°F (175°C) for 12-15 minutes until edges are golden-brown. Cool completely.
- Beat cream cheese, butter, and powdered sugar until smooth. In a separate bowl, whip heavy cream to stiff peaks, then fold into the cream cheese mixture.
- Spread a thin layer of frosting on the crust. Use a piping bag with a star tip to create decorative ridges around the edge.
- Arrange sliced strawberries, blueberries, star-shaped kiwi, and mandarin segments. Brush with melted apricot preserves for a glistening sheen.
Notes
Brush the fruit with apricot glaze to prevent browning and add a professional sheen.
Closing & Call to Action
Creating this Fruit Pizza is a rewarding experience that combines baking precision with artistic flair. The combination of the golden-brown crust and the vibrant, glistening fruit makes it a guaranteed hit at any gathering. If you enjoyed this recipe, please leave a comment below and tell us which fruit combinations you used!
Don’t forget to save this recipe to your dessert boards on Pinterest so you can find it for your next summer bash. Happy baking!