There is something undeniably magnetic about a Tortellini Pasta Salad that has been allowed to marinate to glossy, herb-flecked perfection. Whether you are hosting a backyard gathering or looking for a gourmet meal prep option, this dish stands out with its vibrant colors and sophisticated textures. The plump, cheese-filled pasta serves as the perfect canvas for briny olives, crisp peppers, and savory ribbons of Genoa salami.
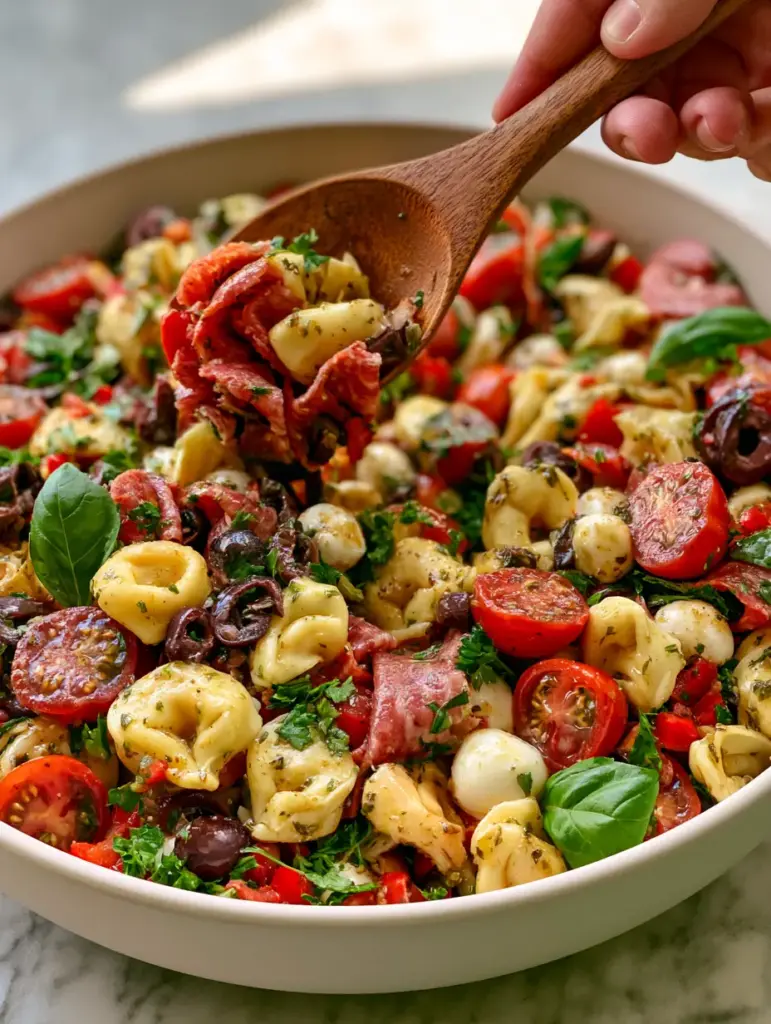
When you look at this dish, the first thing you notice is the visual harmony. Imagine a macro, eye-level view of a large shallow matte white ceramic bowl, where every ingredient is coated in a zesty vinaigrette that creates gentle highlights under natural daylight. From the creamy white mozzarella pearls to the juicy red and yellow heirloom tomatoes, this salad is as much a feast for the eyes as it is for the palate.
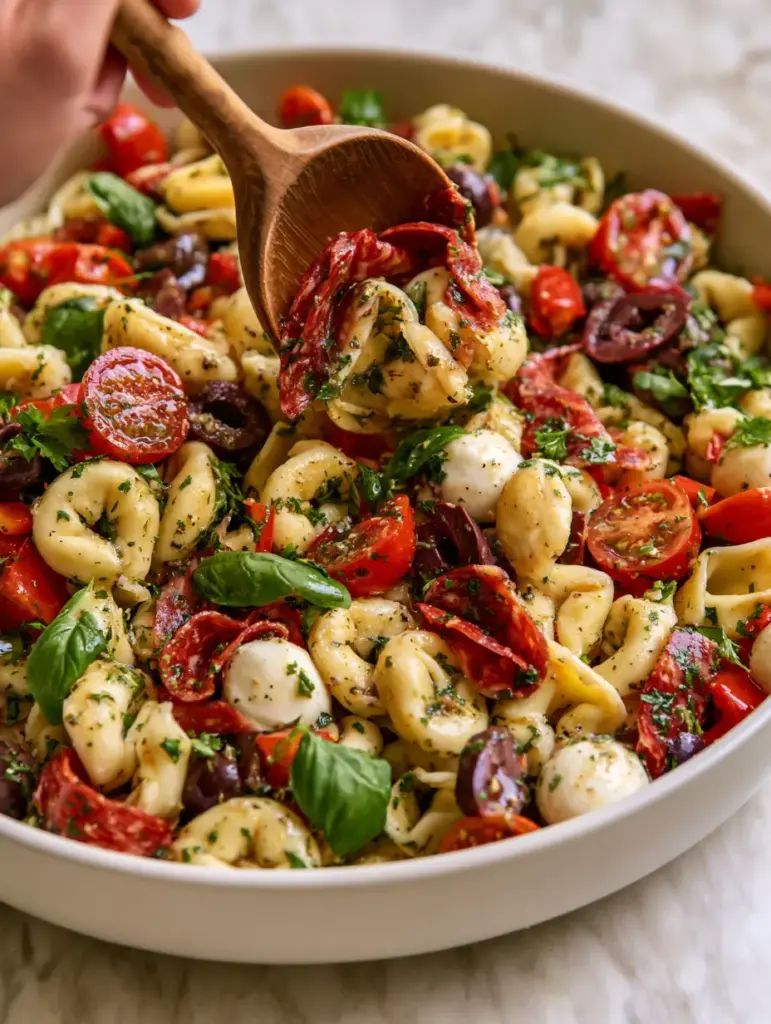
In this guide, we are going to dive deep into the culinary science of creating the perfect pasta salad. We will explore how to achieve that elusive “marinated” texture shown in our rustic wooden spoon close-up, ensuring every bite is balanced, bright, and satisfying.
Why This Zesty Tortellini Pasta Salad Wins Every Time
- Textural Contrast: You get the pillowy softness of cheese tortellini paired with the crunch of diced red bell peppers and the snap of fresh Kalamata olives.
- Savory Depth: Folded Genoa salami ribbons provide a salty, fatty counterpoint to the bright acidity of the herb vinaigrette.
- Visual Vibrancy: The combination of red and yellow cherry tomatoes creates a stunning “heirloom” look that elevates the dish from basic to artisanal.
- Herbaceous Aromatics: Large torn pieces of fresh basil and finely chopped parsley offer a burst of freshness that dried herbs alone cannot achieve.
The Anatomy of an Authentic Italian Tortellini Pasta Salad
To achieve the result seen in our visual blueprint, we must be intentional with our ingredient selection. Every component plays a role in the structural integrity and flavor profile of the final dish.
Cheese Tortellini: 1 lb (450g) of high-quality refrigerated or dried cheese tortellini. This serves as the hearty base, absorbing the vinaigrette while remaining tender yet firm to the bite.
Genoa Salami: 6 oz (170g) of thinly sliced Genoa salami. By folding these into “ribbons,” we create pockets that trap the dressing and add significant visual volume to the bowl.
Fresh Mozzarella Pearls: 8 oz (225g) of creamy mozzarella. These “pearls” provide a mild, milky flavor and a soft texture that contrasts beautifully with the acidic tomatoes.
Heirloom Cherry Tomatoes: 1 cup (150g) each of red and yellow varieties. Halving these releases their juices into the dressing, contributing to the “glossy” finish described in our visual prompt.
Kalamata Olives: 1/2 cup (75g) of sliced olives. These bring the essential Mediterranean brine and a dark purple hue that makes the other colors pop.
Red Bell Pepper: 1 large (approx. 150g) pepper, finely diced. This adds a necessary “crisp” element and a consistent sweetness throughout the salad.
Fresh Herbs: 1/2 cup (15g) torn basil and 1/4 cup (10g) chopped parsley. These are not just garnishes; they provide the aromatic top notes that define an authentic Italian flavor profile.
The “Invisible” Foundation: To create the vinaigrette and cook the pasta, you will need 1 tbsp (15g) kosher salt for the pasta water and 1/2 cup (120ml) of high-quality extra virgin olive oil to achieve the glistening sheen seen in the daylight highlights.
Essential Equipment for a Professional Result
While pasta salad is approachable, using the right tools ensures the textures match our high-detail visual prompt. A large pot is required to give the tortellini enough space to dance without sticking.
A sharp chef’s knife is non-negotiable for achieving the “finely diced” red peppers and cleanly “halved” tomatoes. For the dressing, a glass jar or a small whisk and bowl will help you emulsify the oil and vinegar into a cohesive, glossy coating.
Finally, a large shallow matte white ceramic bowl is the best vessel for presentation. It allows the layers of salami ribbons and mozzarella pearls to stay visible rather than getting lost at the bottom of a deep mixing bowl.
Mastering the Method: Step-by-Step Instructions
1. Preparing the Tortellini Foundation
Bring a large pot of water to a rolling boil and add 1 tbsp (15g) of salt. The water should taste like the sea; this is your only chance to season the pasta itself from the inside out.
Add 1 lb (450g) of cheese tortellini and cook according to the package directions, but aim for “al dente.” The pasta will continue to soften slightly as it marinates in the vinaigrette later.
Drain the pasta and immediately rinse with cold water. This stops the cooking process and removes excess starch, preventing the tortellini from becoming gummy or sticking together in the bowl.
2. Crafting the Glossy Herb Vinaigrette
In a small bowl, whisk together 1/2 cup (120ml) extra virgin olive oil, 3 tbsp (45ml) red wine vinegar, 1 tsp (5g) dried oregano flakes, and a generous pinch of cracked black pepper.
For the best “emulsified” texture, add 1 tsp (5g) of Dijon mustard (a secret culinary bridge ingredient) to help the oil and vinegar stay together. The result should be a zesty, herb-flecked liquid that clings to the back of a spoon.
3. The Art of the Fold and Dice
Take your thin-sliced Genoa salami and fold each piece into quarters or “ribbons.” This technique, as seen in our visual recipe blueprint, adds professional flair and a better mouthfeel.
Halve your red and yellow cherry tomatoes and finely dice the red bell pepper. Ensure the dice is consistent—about 1/4 inch (6mm)—so that you get a bit of everything in every forkful.
4. Assembly and Marination
In your large white ceramic bowl, combine the cooled tortellini, salami ribbons, mozzarella pearls, halved tomatoes, sliced olives, and diced peppers.
Pour the vinaigrette over the top and toss gently with a rustic wooden spoon. You want to see the oil creating gentle highlights on the vegetables and the pasta becoming glistening and saturated.
Fold in the large torn basil leaves and chopped parsley last. Tearing the basil rather than chopping it prevents the edges from bruising and turning black, keeping the salad looking fresh for hours.
Expert Tips for a Stunning Tortellini Pasta Salad
- Room Temperature Service: While this is a “cold” salad, the flavors are most vibrant when served at cool room temperature. If it has been in the fridge, let it sit out for 15 minutes before serving so the olive oil can liquefy.
- The Starch Secret: If you aren’t serving immediately, keep a little extra dressing on the side. Pasta is like a sponge; it will soak up the vinaigrette over time. A quick refresh before serving restores that “glossy” look.
- Color Balance: If you can’t find yellow cherry tomatoes, substitute with orange bell peppers. The goal is to maintain the tri-color visual appeal that makes this dish look artisanal.
- Acid Adjustment: If the salad feels “heavy,” add a squeeze of fresh lemon juice right before serving. The fresh acidity cuts through the fat of the salami and cheese.
Storage and Make-Ahead Instructions
The Tortellini Pasta Salad is an excellent candidate for meal prep. In fact, it often tastes better on day two as the dried oregano flakes and fresh garlic (if added) meld with the fats in the salami.
Store in an airtight container in the refrigerator for up to 4 days. We do not recommend freezing this salad, as the fresh mozzarella pearls and cherry tomatoes will lose their structural integrity and become mushy upon thawing.
What to Serve With Your Pasta Salad
This dish is incredibly versatile. It works perfectly as a standalone lunch or as a side for a larger Italian feast. If you enjoy the bright flavors of this recipe, you might also like a classic Caprese Pasta Salad for your next gathering.
For those who love a variety of textures at their potlucks, consider pairing this with a refreshing summer pasta salad or even a Mexican-inspired street corn pasta. If you prefer a more traditional route, our authentic Italian pasta salad offers a similar flavor profile with different noodle shapes.
For a unique twist, this salad also pairs beautifully with a sweet and salty watermelon feta salad on a hot July afternoon.
Frequently Asked Questions
Yes, you can make it up to 24 hours in advance. In fact, the flavors meld beautifully overnight. Just be sure to reserve a little extra dressing to toss in right before serving to restore the glossy sheen.
The secret is rinsing the cooked pasta under cold running water immediately after draining. This removes excess surface starch and stops the cooking process instantly.
Both work well, but refrigerated ‘fresh’ tortellini usually has a better, more pillowy texture. If using dried, ensure you cook it to a true al dente so it doesn’t fall apart when tossed.
For the best visual appeal and ‘ribbon’ texture, fold thin slices into quarters (half, then half again) or loosely bunch them. This creates pockets that trap the herb vinaigrette.
The Ultimate Zesty Tortellini Pasta Salad Recipe
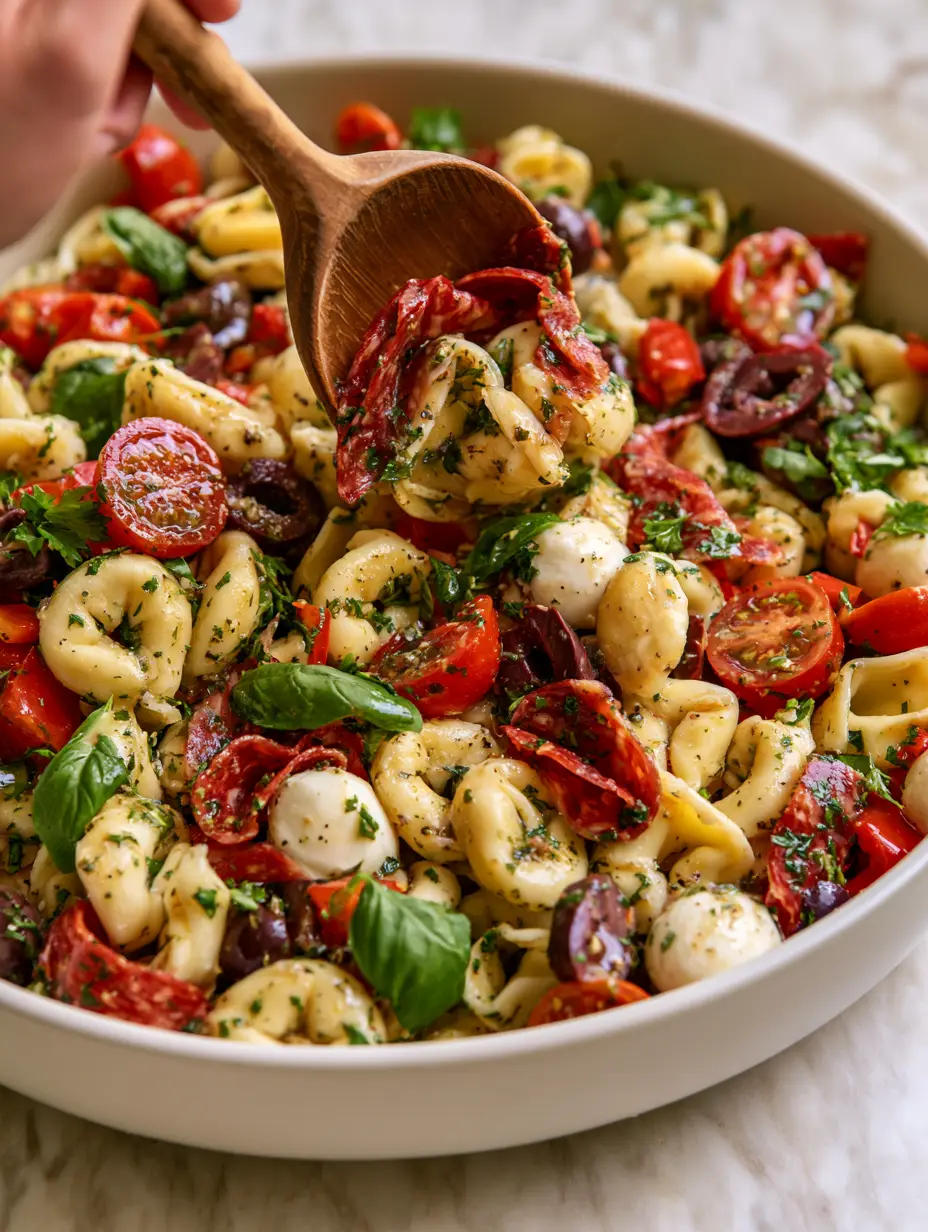
Tortellini Pasta Salad with Genoa Salami and Zesty Herb Vinaigrette
Ingredients
Equipment
Method
- Bring a large pot of salted water to a boil. Cook tortellini until al dente.
- Drain and rinse immediately with cold water to stop cooking and remove excess starch.
- In a small jar, combine olive oil, vinegar, oregano, and black pepper. Shake or whisk until emulsified and glossy.
- In a large shallow bowl, combine cooled tortellini, folded salami, mozzarella pearls, halved tomatoes, sliced olives, and diced peppers.
- Pour dressing over the salad and toss gently. Fold in torn basil and chopped parsley right before serving to maintain freshness.
Notes
If making ahead, reserve a little dressing to refresh the glossy texture before serving.
Closing & Call to Action
This Tortellini Pasta Salad is a testament to how simple ingredients, when prepared with professional techniques, can create a world-class meal. The glossy texture, vibrant colors, and briny depth make it a guaranteed hit at any table. We would love to see your recreations! Please leave a comment below and share your photos by tagging us on Pinterest.