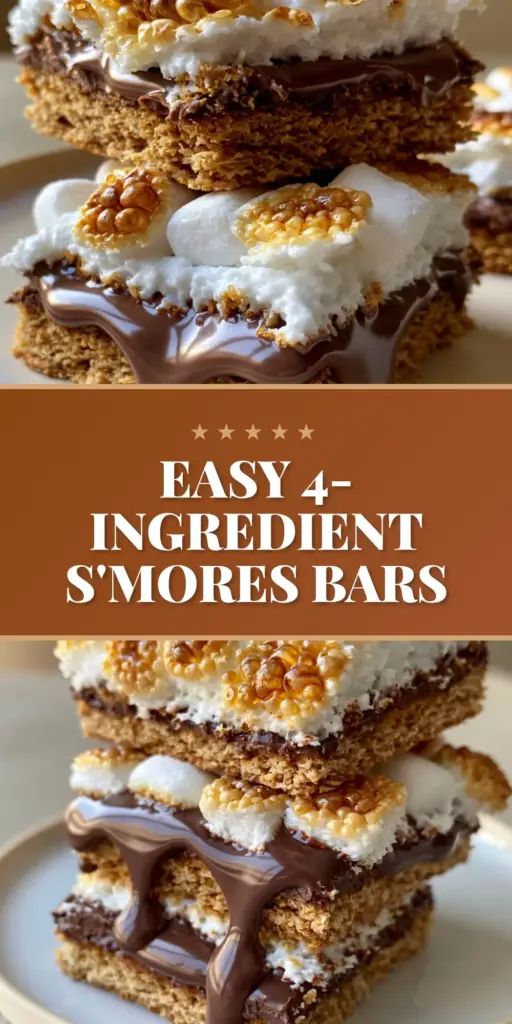
There is nothing quite like the nostalgia of a summer campfire, but these s’mores bars bring that exact magic into your kitchen without the need for an open flame. Imagine a stacked pile of gooey, decadent treats resting on a modern cream ceramic plate, catching the soft, warm side daylight of a lazy afternoon.
Every bite of these s’mores bars delivers a structural symphony: a thick, golden, buttery pressed graham cracker crust followed by a middle layer of thick, glossy, slow-dripping melted milk chocolate. To finish, we crown them with fluffy mini marshmallows, toasted until they reach a beautifully caramelized, golden-brown blistered perfection.
Whether you are hosting a backyard BBQ or looking for the ultimate indoor comfort food, these bars are designed to impress both visually and gastronomically. The contrast between the crunch of the graham and the elastic pull of the toasted marshmallow is a sensory experience you won’t soon forget.
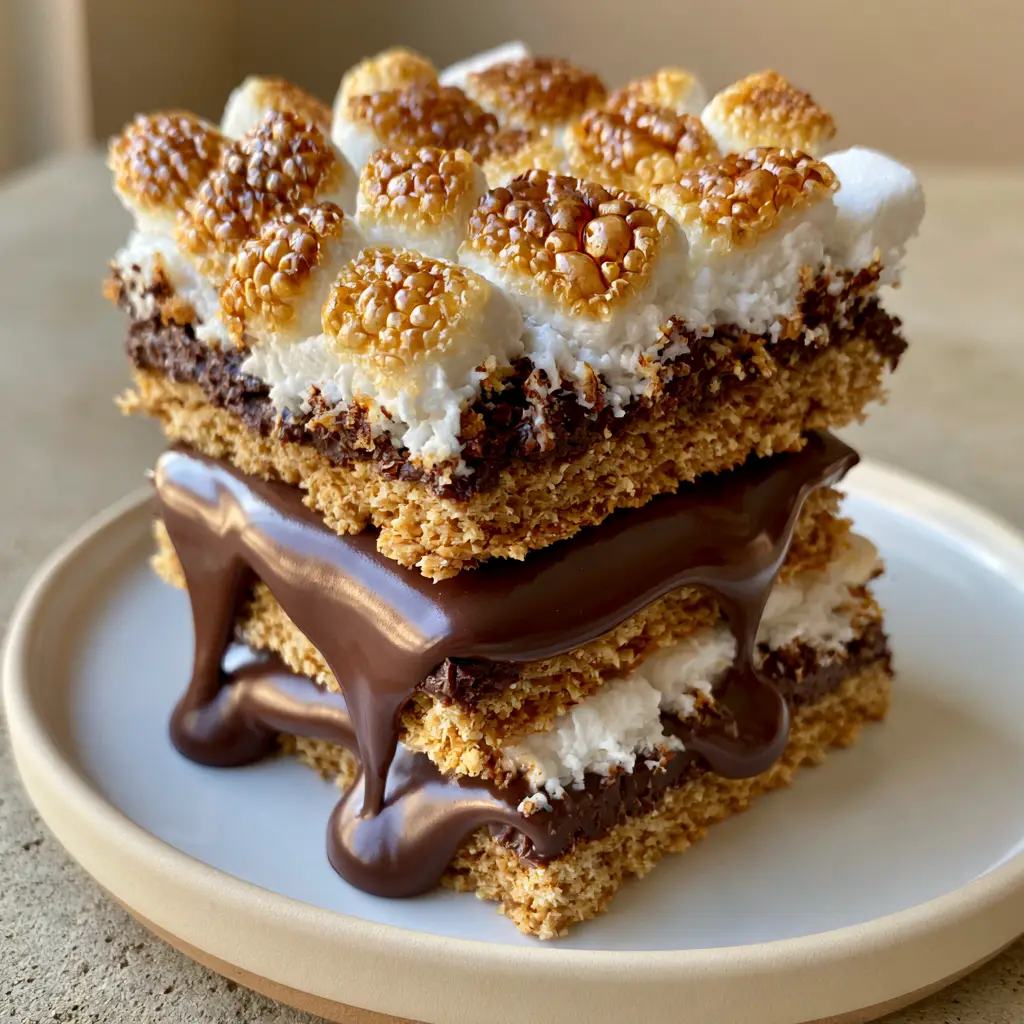
Why These Stacked S’mores Bars Are the Ultimate Crowd-Pleaser
- The Perfect Texture Contrast: You get the crunch of a buttery crust, the silkiness of melted milk chocolate, and the airy chew of blistered marshmallows.
- Visual Showstopper: With their caramelized, blistered tops and slow-dripping chocolate, these bars look like they walked off a professional photo shoot.
- No Campfire Required: Enjoy the classic flavor profile of s’mores year-round using your standard kitchen oven or a handheld torch.
- Stacked for Satisfaction: These are thick-cut bars designed to be held in your hand, emphasizing that “handheld smartphone photo” aesthetic of pure indulgence.
The Anatomy of a Perfect S’mores Bar: Essential Ingredients
To achieve the visual and structural integrity seen in our photos, we must use specific ingredients that react predictably to heat. Each component plays a vital role in the final architecture of the bar.
Graham Cracker Crumbs: 1.5 cups (180g)
These provide the foundational “thick, golden” base. Using pre-crushed crumbs or pulsing whole crackers in a food processor ensures a uniform, tight-packed crust that won’t crumble when handled.
Unsalted Butter, Melted: 1/2 cup (113g)
The “invisible” glue that creates the buttery graham cracker crust. It binds the crumbs together and provides that rich, golden-brown hue once baked.
Granulated Sugar: 1/4 cup (50g)
A small amount of sugar helps caramelize the crust in the oven, ensuring it stays crisp even under the weight of the melted chocolate layer.
Fine Sea Salt: 1/4 tsp (1.5g)
A culinary essential to balance the intense sweetness of the milk chocolate and marshmallows, enhancing the toasted notes of the graham cracker.
Milk Chocolate Bars or Chips: 12 oz (340g)
To achieve that “thick, glossy, slow-dripping” middle layer, milk chocolate is preferred over dark for its lower melting point and classic creamy flavor profile.
Mini Marshmallows: 4 cups (200g)
Miniature marshmallows provide more surface area for “blistering,” resulting in those beautiful caramelized golden-brown tops we are aiming for.
Professional Tools for Gourmet Results
To recreate the exact look of our s’mores bars, you will need a few standard kitchen tools. A 9×9 inch (23x23cm) square baking pan is ideal for achieving the “stacked pile” thickness shown on the ceramic plate.
Parchment paper is non-negotiable here; the melted marshmallow and chocolate are incredibly sticky, and a parchment overhang allows you to lift the entire block out for clean slicing. For the most “blistered” look, a kitchen torch offers the most control, though a standard oven broiler works perfectly well if monitored closely.
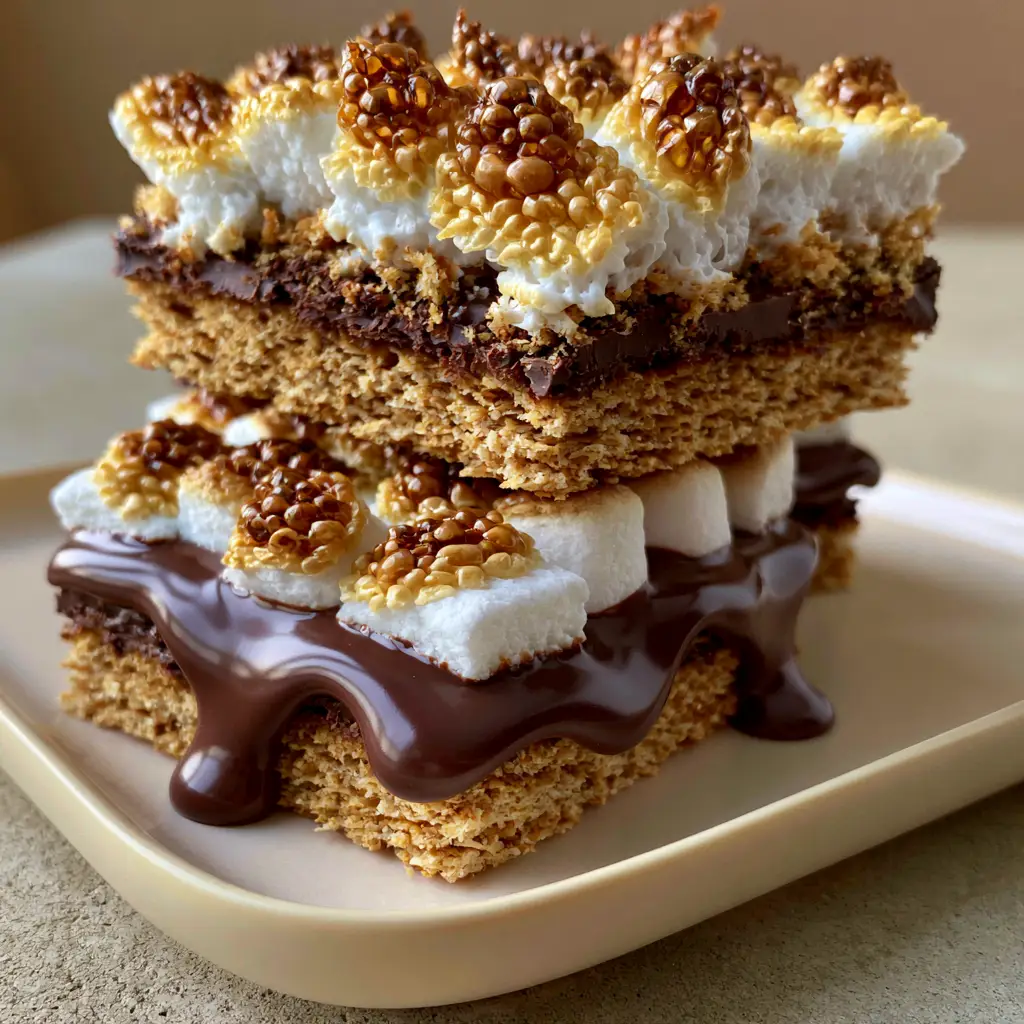
Step-By-Step Guide to Crafting These Decadent Bars
Preparing the Golden Graham Cracker Foundation
Preheat your oven to 350°F (175°C). In a medium mixing bowl, combine the graham cracker crumbs, sugar, and melted butter until the mixture resembles wet sand. Press the mixture firmly into the bottom of your lined 9×9 pan using the bottom of a heavy measuring cup.
Bake the crust for 8-10 minutes. You are looking for a visual cue of the edges just starting to turn a deeper shade of gold, which ensures the crust remains “thick and buttery” rather than soggy.
Creating the Glossy Milk Chocolate Middle Layer
While the crust is still warm from the oven, immediately sprinkle your milk chocolate over the surface. If using bars, break them into uniform pieces first. Return the pan to the oven for 1-2 minutes until the chocolate looks soft and “glossy.”
Use an offset spatula to spread the chocolate into an even, thick layer. This layer should be slow-dripping when the bars are finally cut, so do not overbake the chocolate, or it may become grainy.
Achieving the Perfect Caramelized Marshmallow Top
Switch your oven to the “Broil” setting. Evenly distribute the mini marshmallows over the melted chocolate layer, packing them tightly so no chocolate is visible from above. This creates the “fluffy” top layer described in our visual blueprint.
Place the pan under the broiler for 60-90 seconds. Watch it like a hawk. You are looking for the marshmallows to puff up and develop “beautifully caramelized golden-brown blistered tops.” Remove them the second they reach that deep toasted amber color.
Expert Tips for Visual and Culinary Success
- The “Clean Cut” Secret: For those perfect stacked layers, let the bars cool at room temperature for at least 30 minutes, then refrigerate for 2 hours before slicing with a hot, wet knife.
- Control the Char: If using a broiler, rotate the pan every 20 seconds to ensure the marshmallows caramelize evenly across the entire surface.
- Don’t Scrimp on the Crust: A thin crust will collapse under the weight of the gooey toppings. Ensure your crust is at least 1/2 inch (1.25cm) thick for that “thick, golden” look.
- Warm Serving: To get that “slow-dripping” chocolate effect, briefly microwave individual bars for 10 seconds before serving on your modern ceramic plate.
Sweet Pairings and Serving Suggestions
These s’mores bars are rich and indulgent, making them a fantastic centerpiece for a dessert spread. If you are looking to balance the sweetness, consider serving them alongside a vibrant fruit pizza or some refreshing mini fruit pizzas to provide a tart, acidic counterpoint.
For a summer-themed gathering, these bars follow perfectly after savory sides like a frito corn salad or a zesty charred corn and black bean salad. If you want to keep the “pizza” dessert theme going, these bars also pair beautifully with a peanut butter chocolate chip cookie pizza.
If you enjoy the chocolate and graham cracker combination but want a different texture, you might also love our chewy s’mores cookie bars. For more seasonal inspiration, check out our guide to no-bake Fourth of July desserts.
How to Store and Reheat Your S’mores Bars
Storage: Keep your s’mores bars in an airtight container at room temperature for up to 3 days. If your kitchen is particularly warm, the “glossy” chocolate layer may remain too soft; in this case, store them in the refrigerator.
Freezing: These bars freeze remarkably well. Wrap individual squares in plastic wrap and store in a freezer bag for up to 3 months. Thaw at room temperature for an hour before eating.
Reheating: To restore the “gooey” texture, place a bar on a microwave-safe plate and heat for 10-15 seconds. The marshmallows will puff up slightly and the chocolate will return to its slow-dripping state.
Frequently Asked Questions About S’mores Bars
Yes! These are great for making a day in advance. Just store them at room temperature and briefly warm them in the microwave if you want that signature ‘slow-dripping’ chocolate effect.
While you can, mini marshmallows are preferred for s’mores bars because they melt more evenly and provide that classic ‘blistered’ look with more caramelized surface area.
The best way to get clean slices is to chill the bars in the refrigerator for at least 2 hours. Use a sharp knife dipped in hot water and wiped dry between every single cut.
Milk chocolate is traditional for that nostalgic s’mores flavor and melts into a glossy, thick layer. However, you can use semi-sweet chocolate if you prefer a less sugary taste.
A crumbling crust usually means there wasn’t enough melted butter or it wasn’t pressed firmly enough into the pan. Use the bottom of a flat measuring cup to pack the crumbs tightly.
The Ultimate Gooey S’mores Bar Recipe
S'mores Bars with Gooey Milk Chocolate and Toasted Marshmallow Tops
Ingredients
Equipment
Method
- Preheat oven to 350°F (175°C). Combine graham cracker crumbs, sugar, salt, and melted butter in a bowl until it looks like wet sand.
- Press the mixture firmly into a parchment-lined 9x9 inch pan. Bake for 8-10 minutes until the edges are golden brown.
- Sprinkle milk chocolate over the hot crust. Return to oven for 1-2 minutes until glossy and soft.
- Spread the chocolate into an even, thick layer using an offset spatula.
- Cover the chocolate completely with mini marshmallows, packing them tightly.
- Broil for 60-90 seconds until tops are caramelized and blistered golden-brown. Watch closely to avoid burning.
Notes
Use a hot knife to cut through the sticky marshmallow layer easily.
Closing Thoughts: Join the S’mores Celebration!
Crafting the perfect s’mores bars is an exercise in patience and precision, but the reward—a stack of toasted, chocolatey bliss—is entirely worth it. The way the blistered marshmallows catch the light on a beige concrete tabletop is enough to make any home cook feel like a professional pastry chef.
If you loved this recipe, please leave a comment below and let us know how your toasted tops turned out! Don’t forget to share your photos and save this recipe to your favorite boards on Pinterest so you can find it every time that campfire craving hits.