There is something undeniably nostalgic about the combination of toasted marshmallows, melty chocolate, and buttery graham crackers. These s’more bars take that classic campfire experience and elevate it into a sophisticated, decadent dessert that you can make right in your kitchen.
Forget the flimsy, dry versions you may have tried before; these bars are defined by their thick, buttery foundation and a stretchy, gooey center that pulls apart just like a dream. Every bite delivers a symphony of textures, from the crunch of the coarse graham crumbs to the silkiness of the semi-sweet chocolate chunks.
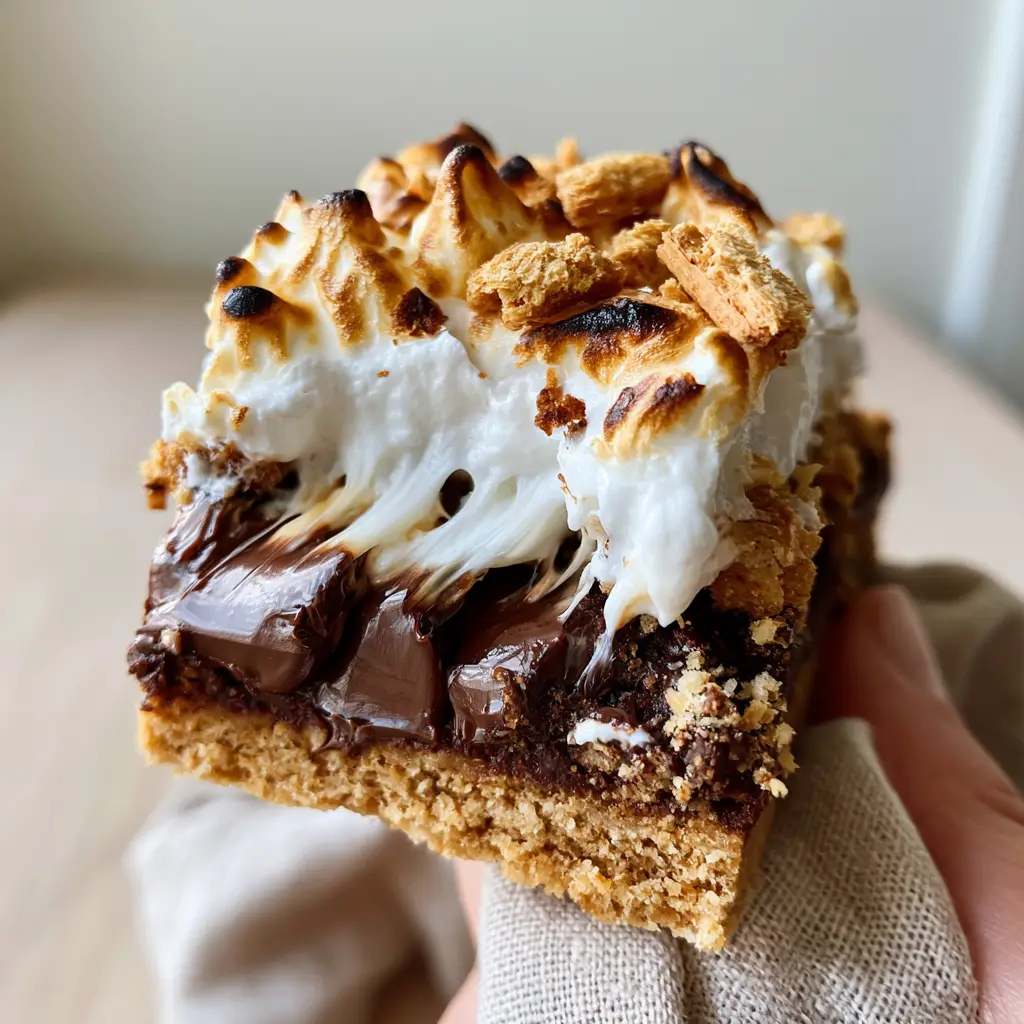
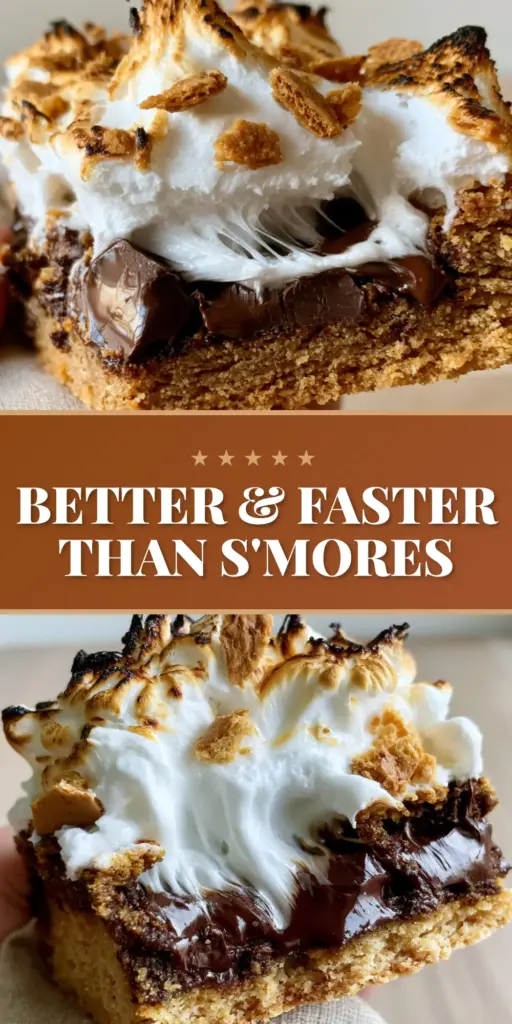
The crown jewel of this recipe is the mountain of billowy marshmallow fluff, finished under a broiler to achieve those iconic, charred campfire-gold peaks. Whether you are serving these at a summer BBQ or craving a cozy indoor treat, these s’more bars are designed to impress both visually and gastronomically.
Why These Gooey S’more Bars Stand Out
- Textural Contrast: A sturdy, golden-brown graham cracker crust provides the perfect crunch against the soft, pillowy marshmallow topping.
- Gourmet Chocolate Experience: We use thick, glossy, partially melted dark chocolate chunks instead of standard chips for a richer, more intense cocoa flavor.
- The Perfect Char: By using a combination of marshmallow fluff and crushed graham crackers on top, we achieve a professional “toasted” look that mimics a real campfire.
- Handheld Perfection: These bars are structurally sound enough to be held in a hand with a soft linen napkin, making them the ultimate social media-ready treat.
The Anatomy of a Perfect S’more Bar Ingredient List
To achieve the visual and structural results seen in our professional photography, every ingredient serves a specific culinary purpose. We don’t just want flavor; we want that iconic “pull” and the perfect golden crumb.
Graham Cracker Crumbs: You will need 2 cups (240g) of finely crushed graham crackers. These provide the structural integrity for the base, ensuring your s’more bars don’t fall apart when handled.
Melted Unsalted Butter: 3/4 cup (170g) of high-quality melted butter acts as the glue for our crust. It adds a rich, nutty flavor that complements the honey notes in the crackers.
Granulated Sugar: 1/4 cup (50g) of sugar helps to caramelize the crust during the par-baking process, giving it that “golden-brown” hue described in our visual blueprint.
Semi-Sweet Dark Chocolate Chunks: 2 cups (340g) of semi-sweet chunks are essential. Chunks retain their shape better than chips, providing those thick, glossy pools of chocolate that look stunning when the bar is pulled apart.
Marshmallow Fluff: 1 jar (7.5 oz / 213g) of marshmallow fluff creates the “stretchy, gooey marshmallow center.” Unlike regular marshmallows, fluff stays soft even after the bars have cooled.
Large Marshmallows: 2 cups (100g) of halved large marshmallows are tucked into the fluff to create those “billowy mountains” and “charred golden peaks” during the final broil.
Vanilla Extract and Salt: 1 tsp (5ml) of vanilla and a pinch of fine sea salt are the “invisible” ingredients that balance the intense sweetness and enhance the chocolate’s profile.
Essential Equipment for Culinary Success
Achieving the perfect s’more bars requires more than just a bowl and a spoon. To get that clean, minimalist look and the perfect texture, ensure you have the following gear ready.
An 8×8 inch (20x20cm) square baking pan is the ideal size for “thick” bars. Using a larger pan will result in thin, brittle layers that lack the satisfying “pull” we are looking for. You should also use parchment paper with an overhang on the sides; this allows you to lift the entire block of bars out of the pan for clean slicing.
A kitchen torch is optional but highly recommended if you want total control over the “campfire-gold peaks.” However, a standard oven broiler works perfectly fine as long as you watch the bars like a hawk to prevent burning the delicate sugar in the marshmallow fluff.
A Step-by-Step Guide to S’more Bar Perfection
Crafting the Buttery Graham Cracker Foundation
Start by preheating your oven to 350°F (175°C). In a medium mixing bowl, combine the 2 cups (240g) of graham cracker crumbs, 1/4 cup (50g) of sugar, and a pinch of salt. Pour in the 3/4 cup (170g) of melted butter and stir until the mixture resembles wet sand.
Press 2/3 of this mixture firmly into the bottom of your lined baking pan. Use the bottom of a flat measuring cup to pack it down hard; this prevents the crust from being too crumbly. Save the remaining 1/3 of the crumbs—we will use these later for the “crushed graham cracker topping.”
Bake the crust for 8-10 minutes. Look for a visual cue: the edges should just be starting to turn a deeper shade of brown. This par-baking step is what gives us the “golden-brown, buttery graham cracker crust with visible coarse crumbs” mentioned in our visual prompt.
Layering the Glossy Chocolate and Marshmallow Fluff
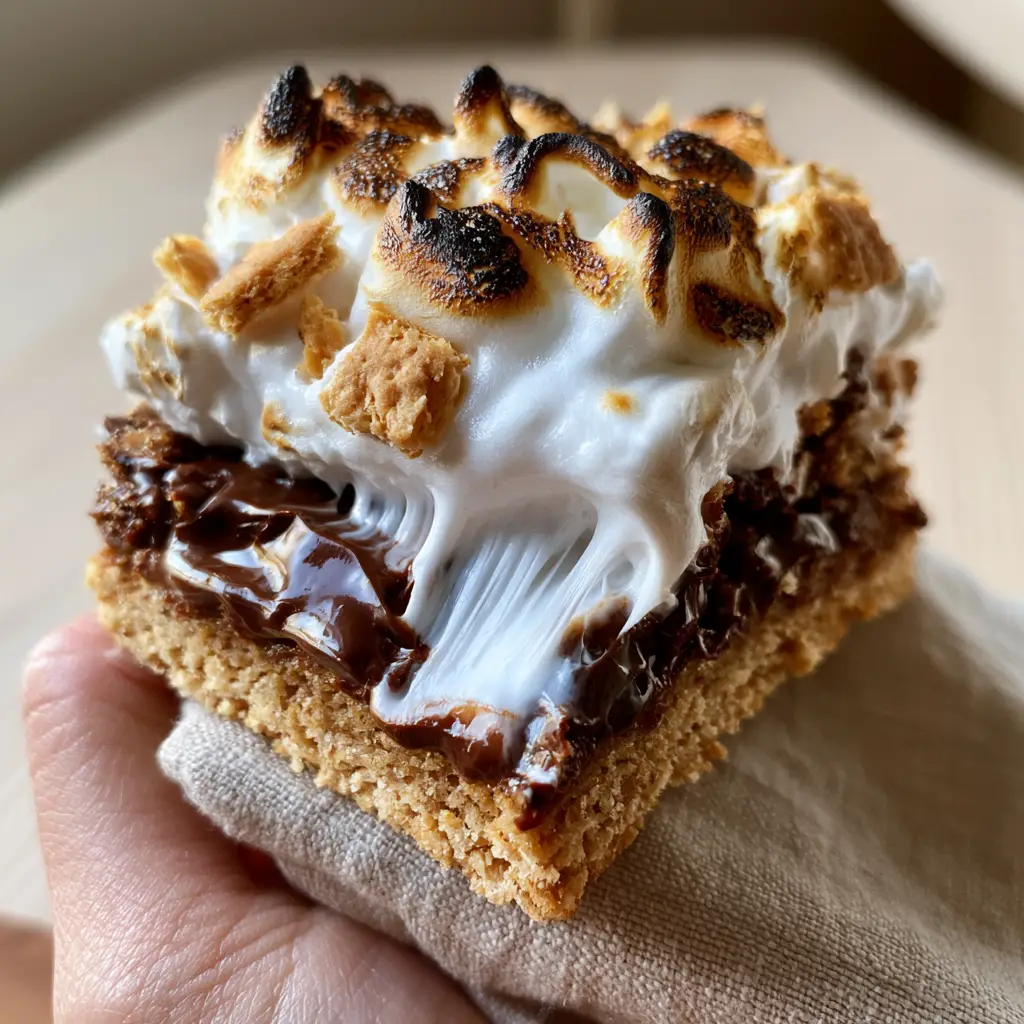
While the crust is still warm from the oven, sprinkle 1.5 cups (255g) of the dark chocolate chunks evenly over the base. Let them sit for 2 minutes; the residual heat will soften them into “thick, glossy, partially melted dark chocolate chunks.”
Next, spoon the marshmallow fluff over the chocolate. Because fluff is sticky, it helps to drop small dollops across the surface and then gently spread them with a greased spatula. This layer creates the “stretchy, gooey marshmallow center” that is revealed when the bar is pulled apart.
Achieving the Charred Campfire Peaks
Take your large marshmallows and cut them in half crosswise. Press them, cut-side down, into the fluff layer. Sprinkle the remaining chocolate chunks and the reserved graham cracker crumbs over the top. Press a few “small shards of crisp graham crackers” into the marshmallow mounds for added texture.
Place the pan back in the oven for 5-7 minutes until the marshmallows are puffed and soft. For the final touch, turn your oven to the “Broil” setting. Watch closely for 30-90 seconds. You are looking for the marshmallows to transform into “billowy marshmallow fluff with perfectly toasted, charred campfire-gold peaks.”
Expert Tips for the Ultimate Social Media-Ready Bar
- The Clean Cut: To get those perfect, professional edges, let the s’more bars cool completely at room temperature, then chill in the fridge for 30 minutes before slicing. Grease your knife with a little butter or oil between every single cut to prevent the marshmallow from sticking.
- Marshmallow Management: If you don’t have fluff, you can use a layer of mini marshmallows, but the texture will be slightly more chewy and less “stretchy” than the visual prompt suggests.
- Salt is Key: Don’t skip the salt in the crust. It provides a necessary contrast to the sugar-heavy marshmallow and chocolate layers.
- Watch the Broiler: Sugar burns in a heartbeat. Stay by the oven door with the light on. The difference between “perfectly toasted” and “burnt” is often just 5 seconds.
Storing and Reheating Your Treats
These s’more bars are best enjoyed the day they are made, especially if you want that maximum marshmallow stretch. However, they can be stored in an airtight container at room temperature for up to 3 days.
If you want to regain that “gooey” texture after the bars have cooled, pop a single bar in the microwave for 10-15 seconds. The chocolate will remelt and the marshmallow fluff will regain its billowy, stretchy consistency.
Avoid refrigerating these for long periods unless you prefer a very firm, cold fudge-like texture. Freezing is not recommended as the marshmallow fluff can become unpleasantly sticky and lose its structural integrity upon thawing.
What to Serve with S’more Bars
These bars are incredibly rich, so they pair beautifully with fresh, vibrant flavors or other classic summer treats. If you are hosting a summer gathering, consider balancing the sweetness with a chickpea cucumber feta salad or a refreshing watermelon feta salad.
For a full dessert spread, these bars sit perfectly next to a fruit pizza or even some mini fruit pizzas for a variety of textures and colors. If you want to lean into the cookie-style dessert theme, you might also enjoy a peanut butter chocolate chip cookie pizza alongside your s’more bars.
Frequently Asked Questions
Yes, but fluff provides a much better ‘stretchy’ pull that remains soft when cooled. If using mini marshmallows, the texture will be slightly chewier and may become firm once the bars reach room temperature.
No, a kitchen torch gives more precision, but an oven broiler works perfectly. Just be sure to watch them the entire time, as the sugar in the marshmallow can go from golden to burnt in seconds.
The secret is to let the bars cool completely, then chill them in the fridge for 30 minutes. Use a sharp knife greased with a tiny amount of butter or neutral oil, and wipe it clean between every cut.
Microwave a single bar for 10-15 seconds. This softens the marshmallow fluff and remelts the chocolate chunks, restoring that signature gooey texture from the original bake.
This usually happens if the crumbs aren’t packed tightly enough or if there isn’t enough butter. Make sure to use a flat-bottomed cup to firmly press the crust into the pan before par-baking.
The Ultimate Gooey S’more Bars Recipe
S’more Bars with Toasted Marshmallow Fluff and Dark Chocolate Chunks
Ingredients
Equipment
Method
- Combine graham cracker crumbs, melted butter, sugar, and salt. Press 2/3 of the mixture into the bottom of a lined 8x8 pan.
- Bake the crust at 350°F (175°C) for 8-10 minutes until golden-brown and set.
- Sprinkle 1.5 cups of chocolate chunks over the hot crust. Let melt for 2 minutes and spread slightly.
- Dollop marshmallow fluff over the chocolate. Top with halved marshmallows, remaining chocolate, and reserved crumbs.
- Bake for 5-7 minutes until marshmallows are puffed.
- Broil for 30-90 seconds until marshmallow peaks are charred golden-brown.
Notes
Allow the bars to set for at least 30 minutes before slicing to ensure the chocolate has firmed up slightly.
A Campfire Classic in Every Bite
Making s’more bars at home is the perfect way to capture the magic of summer year-round. With their thick graham cracker crust, glossy dark chocolate, and those iconic charred marshmallow peaks, they are guaranteed to be the star of any dessert table. The combination of textures—the crunch, the melt, and the stretch—creates a truly sensory eating experience.
If you loved this recipe, please leave a comment below and let us know how your charred peaks turned out! Don’t forget to share your creations and pin this recipe to your favorite dessert boards on Pinterest so you never lose this campfire classic.