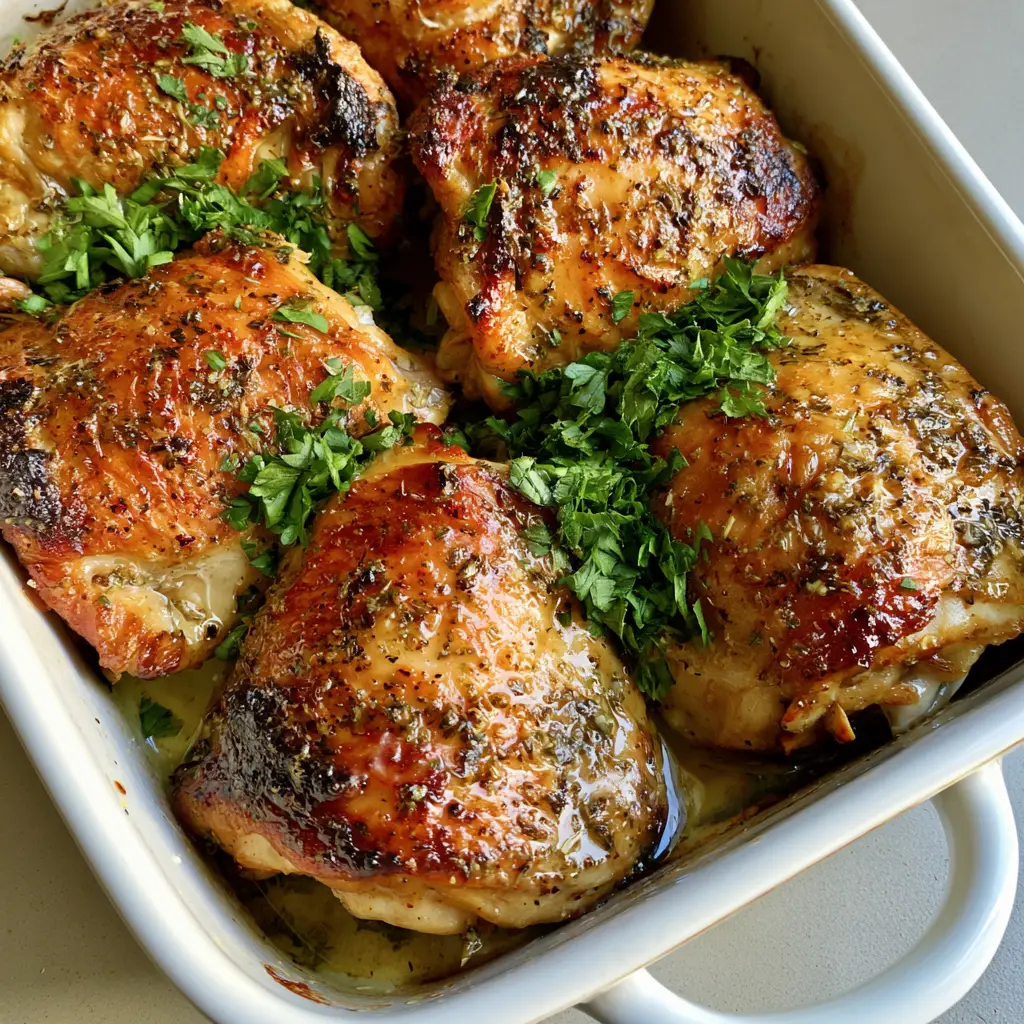
Ranch Chicken Thighs are the ultimate weeknight dinner solution, combining the nostalgic, zesty flavor of buttermilk ranch with the irresistible texture of deeply golden-brown, crispy chicken skin. If you are looking for a meal that looks like it stepped off a professional photo shoot but requires minimal effort, this is the recipe for you. These thighs are roasted to perfection in a white ceramic baking dish, ensuring every drop of juicy rendered fat and melted butter infuses the meat with incredible flavor.
The beauty of this dish lies in its simplicity and high visual impact. Imagine pulling a tray out of the oven where the chicken skin is literally glistening with a buttery coating and the edges are perfectly charred. The contrast between the vibrant green parsley garnish and the textured herb flecks from the ranch seasoning makes this a Pinterest-worthy centerpiece that tastes even better than it looks.
Why These Zesty Roasted Thighs Are a Game Changer
- Unbeatable Texture: We use a specific roasting technique to ensure the skin achieves a crackling, crispy finish while the meat remains succulent and tender.
- Flavor Explosion: The dry ranch seasoning rub, combined with black pepper and fine herb flecks, creates a complex crust that beats plain salt and pepper every time.
- Visual Appeal: With visible charred edges and a bright garnish of fresh chopped parsley, this dish is designed to impress anyone at your table.
- One-Pan Ease: Everything happens in one rectangular baking dish, meaning cleanup is a breeze after you’ve enjoyed your meal.
If you love the flavor profile of ranch, you should also check out our Chicken Bacon Ranch Pasta for a creamy comfort food alternative or our Chicken Bacon Ranch Sandwich for a quick lunch.
The Essential Ingredients for Perfect Ranch Chicken Thighs
To achieve the forensic visual accuracy seen in our photos, each ingredient serves a specific culinary purpose. Do not skip the butter—it is the secret to that glistening, professional finish.
- 6-8 Chicken Thighs (approx. 3 lbs / 1.4kg): We recommend bone-in, skin-on thighs. The bone keeps the meat moist at high temperatures, and the skin provides the canvas for our crispy ranch crust.
- 3 tbsp (45ml) Extra Virgin Olive Oil: This acts as the binder for our dry rub and helps conduct heat for even browning.
- 1 packet (28g) Dry Ranch Seasoning Mix: Look for a mix with visible dried dill, chives, and garlic bits to create that signature textured look.
- 1 tsp (5ml) Freshly Cracked Black Pepper: Adds a subtle heat and dark flecks that pop against the golden skin.
- 4 tbsp (56g) Unsalted Butter, melted: We brush this on during the final stages of cooking to create a glistening, buttery coating.
- 1/2 cup (15g) Fresh Parsley, finely chopped: The final “pop” of color that balances the rich, savory tones of the roasted meat.
For those who enjoy a bit more kick in their poultry dishes, our Crockpot Cajun Butter Chicken offers a similar buttery richness with a spicy southern twist.
How to Make Ranch Chicken Thighs with Crispy Charred Edges
Achieving the perfect roast requires a balance of high heat and proper spacing. Follow these steps to ensure your chicken looks exactly like the Visual Recipe Blueprint.
Step 1: Prep and Season for Maximum Flavor
Preheat your oven to 400°F (204°C). Pat the chicken thighs bone-dry with paper towels. This is the most important step for crispy skin; any moisture left on the skin will cause it to steam rather than sear. Place the thighs in a large bowl and toss with the olive oil, ranch seasoning, and black pepper. Ensure the herb flecks are evenly distributed across the surface of the skin.
Step 2: The Art of Packing the Dish
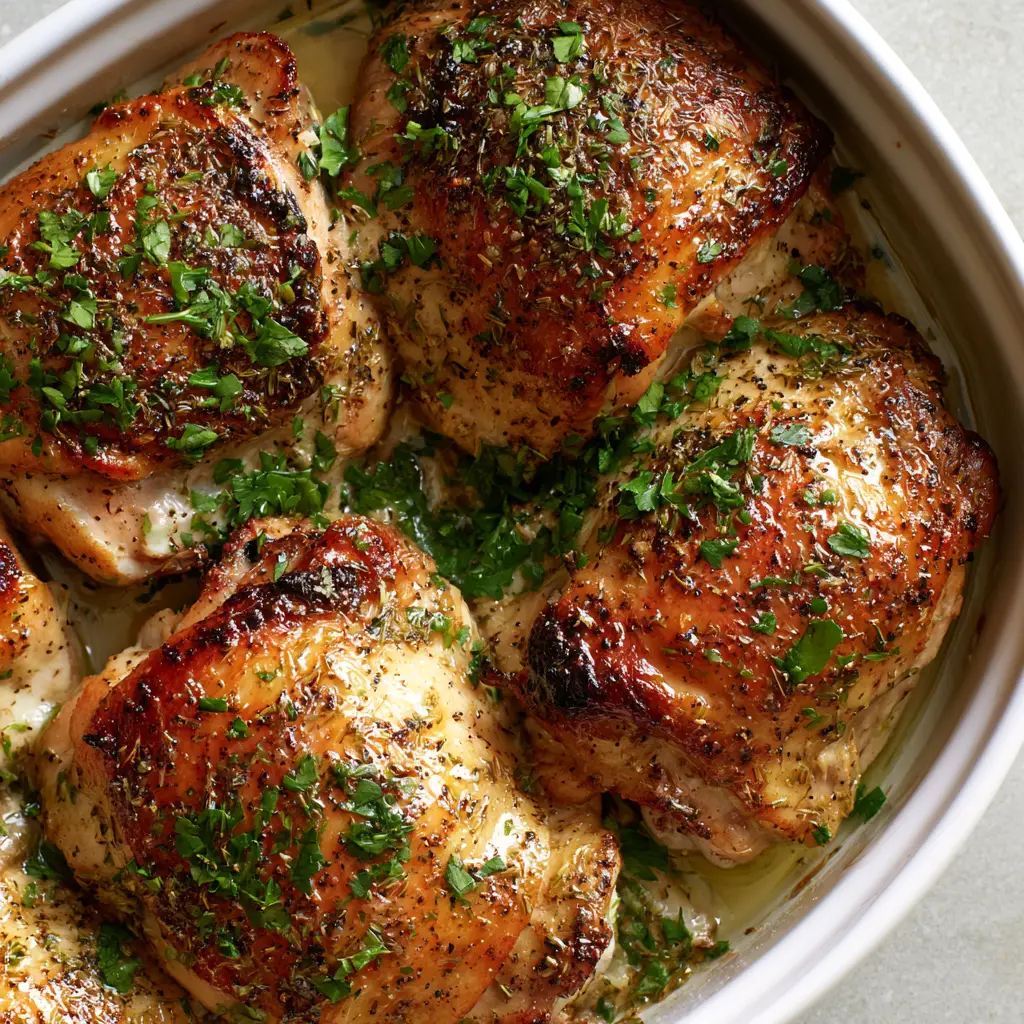
Arrange the seasoned chicken thighs inside a white ceramic rectangular baking dish. You want them tightly packed, just like in our photo, so the juices pool at the bottom. This allows the bottoms of the thighs to confit in their own rendered fats while the tops are exposed to the dry heat of the oven.
Step 3: Roasting to Golden Perfection
Place the dish on the center rack and roast for 30-35 minutes. At this point, the skin should be turning a light golden brown. Open the oven and carefully brush the melted butter over each thigh. This creates that glistening, buttery coating that defines this recipe. Return to the oven for another 10 minutes.
Step 4: The Final Char
To get those visible charred edges, turn your broiler to high for the last 2-3 minutes of cooking. Watch closely! You want the edges to darken and crisp up without burning the herbs. Remove from the oven when the internal temperature reaches 165°F (74°C).
Step 5: Garnish and Serve
While the chicken rests in the dish, scatter a generous garnish of fresh, bright green chopped parsley over the meat. The residual heat will slightly soften the parsley, releasing its aroma. Serve directly from the ceramic dish to showcase the juicy rendered fats at the bottom.
If you’re a fan of these flavors, you might also love our Mayonnaise Parmesan Chicken for another ultra-moist chicken dinner option.
Expert Tips for Pinterest-Perfect Success
- Room Temperature Meat: Take your chicken out of the fridge 20 minutes before cooking. This ensures the juicy rendered fats melt evenly rather than seizing up.
- Use a Ceramic Dish: Ceramic retains heat beautifully and provides that clean, neutral background that makes the golden chicken colors pop.
- Don’t Over-Garnish: While we want a generous amount of parsley, ensure you can still see the dry ranch seasoning rub and the charred skin underneath.
- Internal Link Tip: If you have leftovers, they are incredible when shredded and added to our Chicken Pasta Casserole.
Storage, Reheating, and Freezing
Storage: Keep leftover Ranch Chicken Thighs in an airtight container in the refrigerator for up to 4 days. The skin will lose some crispness, but the flavor will deepen.
Reheating: For best results, reheat in an oven or air fryer at 350°F (175°C) until warmed through. This helps revive the buttery coating and crispy texture. Avoid the microwave if you want to keep the skin from becoming rubbery.
Freezing: You can freeze the cooked thighs for up to 3 months. Thaw overnight in the fridge before reheating.
What to Serve With Ranch Chicken Thighs
This dish is incredibly versatile. We recommend serving it alongside roasted root vegetables or a crisp green salad to cut through the richness of the butter. If you want a full comfort meal, pair it with a side of creamy mashed potatoes or our Cowboy Butter Chicken Pasta for a double dose of herb-butter goodness.
Frequently Asked Questions
Yes, cook at 380°F (193°C) for 18-22 minutes, flipping halfway through, though you’ll get the best buttery glisten in a traditional oven.
Yes, but you will need to reduce the cooking time to 20-25 minutes. Note that you won’t get the same level of crispy skin as you would with bone-in thighs.
The secret is patting the skin bone-dry with paper towels before seasoning and using the broiler for the final 2 minutes of cooking.
Absolutely! A standard 1-ounce packet of dry ranch dressing mix is perfect for this recipe and provides all the herbs and spices needed.
A white ceramic rectangular baking dish is ideal because it distributes heat evenly and makes for a beautiful table presentation.
The Ultimate Ranch Chicken Thighs Recipe Card
Ranch Chicken Thighs With Crispy Skin and Herb Butter
Ingredients
Equipment
Method
- Preheat oven to 400°F (204°C). Pat chicken thighs bone-dry with paper towels to ensure crispy skin.
- Toss chicken with olive oil, ranch seasoning, and black pepper until herb flecks are evenly distributed.
- Place thighs skin-side up in a white ceramic baking dish, packing them tightly.
- Roast for 35 minutes. Brush with melted butter for a glistening coating and roast for 10 more minutes.
- Broil on high for 2-3 minutes until you see visible charred edges and deep golden-brown skin.
- Scatter fresh chopped parsley over the chicken and serve directly from the dish with its rendered fats.
Notes
Patting the skin dry is essential for that professional crackling texture.

Save This Recipe to Pinterest!
Did you love these Ranch Chicken Thighs? If so, please save this recipe to your Favorite Chicken Recipes board on Pinterest! It helps others find this delicious meal. We’d love to see your results—feel free to share a photo of your dish in the comments below or tag @evay_eats. Don’t forget to leave a 5-star rating in the recipe card above if you enjoyed the crispy, buttery goodness!