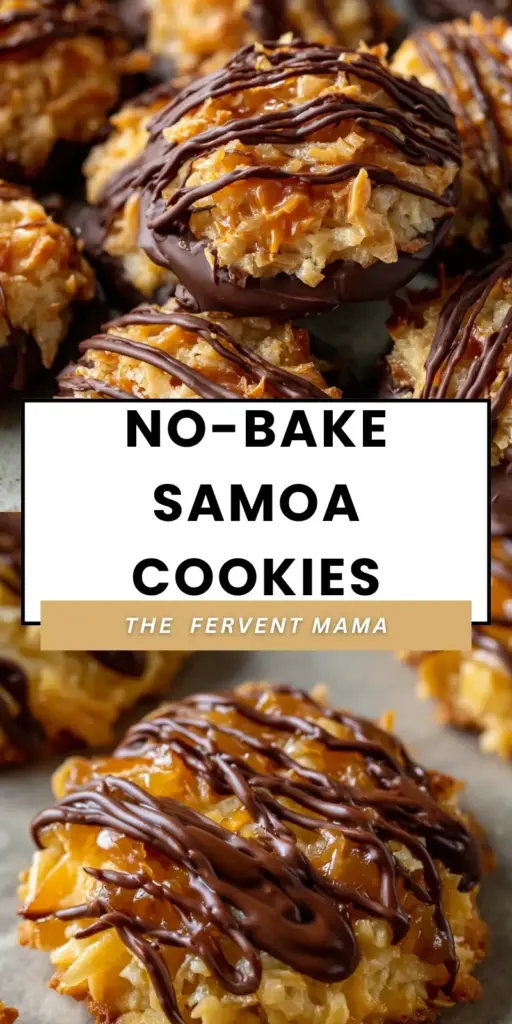
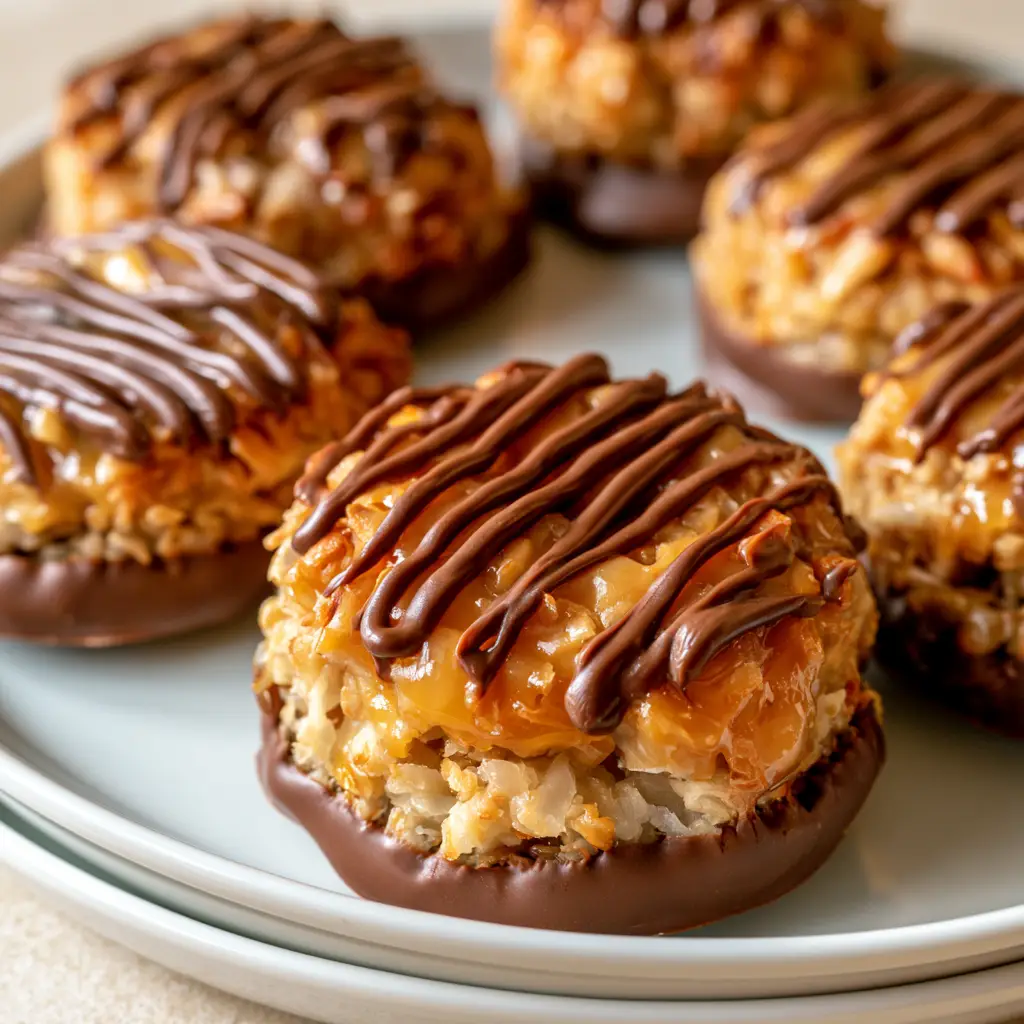
If you have been searching for the perfect No-Bake Samoa Cookies, you have finally arrived at dessert heaven. These cookies are a tribute to the iconic Girl Scout classic, featuring a dense, chewy mixture of toasted golden-brown coconut shreds and sticky, translucent amber-colored caramel. By skipping the oven, we maintain a fudge-like texture that melts in your mouth while capturing that nostalgic flavor profile we all crave.
Every bite of these No-Bake Samoa Cookies delivers a multi-sensory experience: the crunch of the toasted coconut, the pull of the rich caramel, and the snap of the dark chocolate base. Whether you are a seasoned baker or a kitchen novice, this recipe is designed for maximum success with minimal effort. Let’s dive into how you can recreate this viral-worthy treat right in your own kitchen.
Why You Will Crave These Chewy No-Bake Samoa Cookies
- Visual Perfection: These cookies feature a meticulously detailed zig-zag drizzle of dark chocolate over a golden, textured coconut ring.
- No-Oven Needed: Perfect for hot summer days or when your oven is occupied with a Garlic Parmesan Pasta Bake.
- Decadent Texture: The combination of amber-colored caramel and toasted coconut creates a professional-grade chewiness.
- Store-Bought Quality at Home: They look exactly like the handheld smartphone photos you see on Pinterest—glossy, textured, and incredibly inviting.
The Secret Ingredients for Professional No-Bake Samoa Cookies
To achieve the specific texture and “Visual Recipe Blueprint” required for these cookies, each ingredient serves a specific culinary purpose. We aren’t just mixing things together; we are building layers of flavor.
3 cups (225g) Shredded Sweetened Coconut: This is the heart of the cookie. We will toast this to a golden-brown hue to provide both flavor and a satisfying crunch.
11 oz (310g) Chewy Caramels: Use high-quality soft caramels. When melted, they provide that translucent amber color that binds the coconut together into a thick, sturdy ring.
2 tbsp (30ml) Heavy Cream or Whole Milk: This prevents the caramel from becoming too hard once it cools, ensuring a “soft-bite” texture rather than a tooth-breaking one.
1/4 tsp (1.5g) Fine Sea Salt: A vital “invisible” ingredient. Salt cuts through the sugar of the caramel, brightening the toasted notes of the coconut.
8 oz (225g) Dark Chocolate Melting Wafers: Dark chocolate provides the sophisticated bitterness needed to balance the sweet topping. We use this for the solid bottom layer and the signature zig-zag drizzle.
If you love the flavor profile of these treats, you might also enjoy our Samoa Box Mix Brownies for a more cake-like experience.
Step-By-Step: Creating the Perfect Golden Coconut Rings
Step 1: Toasting the Coconut to Golden Perfection
Start by spreading your 3 cups (225g) of shredded coconut onto a large baking sheet. Even though this is a No-Bake Samoa Cookies recipe, a quick 5-8 minute toast at 350°F (175°C) is non-negotiable for flavor. Watch for the visual cue: the shreds should turn a vibrant golden-brown and smell intensely nutty. If you prefer a completely stovetop method, you can toast them in a large skillet over medium heat, stirring constantly until they reach that toasted golden-brown appearance.
Step 2: Melting the Translucent Amber Caramel
In a microwave-safe bowl, combine the caramels and 2 tbsp (30ml) of cream. Heat in 30-second intervals, stirring vigorously in between. You are looking for a smooth, glossy, and translucent amber-colored liquid. Once melted, stir in the sea salt. Immediately fold in the toasted coconut until every shred is thoroughly coated in the sticky caramel mixture. The mixture should be thick and hold its shape when pressed.
Step 3: Forming the Iconic Samoa Cookie Ring
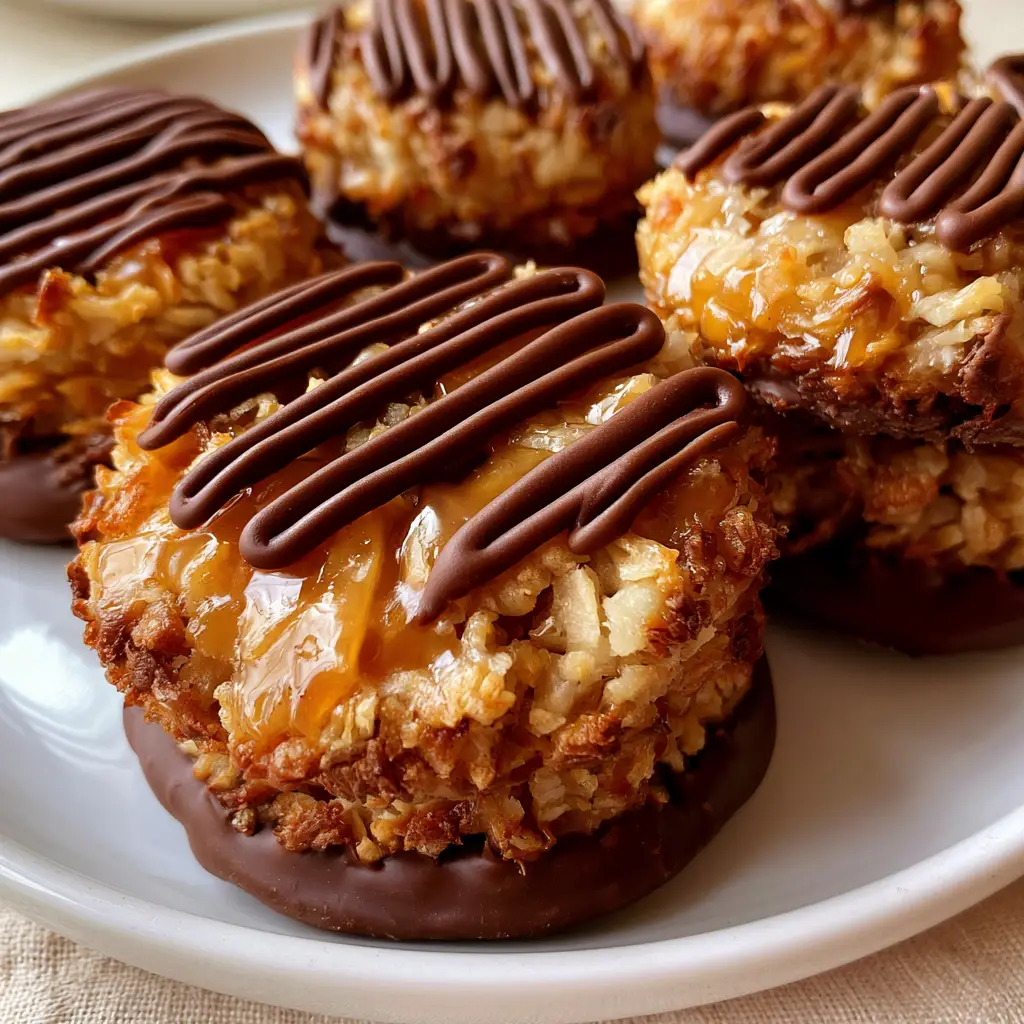
While the mixture is still warm and pliable, scoop about 2 tablespoons of the coconut-caramel blend onto a sheet of parchment paper. Grease your hands slightly with oil or butter. Roll the mixture into a ball, flatten it into a disc, and use the end of a wooden spoon or your finger to form a perfect thick ring. If the mixture gets too cool and stiff, pop it back in the microwave for 10 seconds to soften the caramel.
Step 4: The Dark Chocolate Bottom and Drizzle
Melt your dark chocolate in a small bowl. Dip the bottom of each cookie into the chocolate, ensuring a smooth, solid layer is applied. Place them back on the parchment paper to set. Once the bottom is firm, use a spoon or a piping bag to create a precise zig-zag drizzle across the top of each cookie. This creates the gentle highlights on the glossy caramel and textured coconut that make these cookies look professional.
For a different twist on the caramel-chocolate combo, check out our No-Bake Salted Caramel Pretzel Bars.
Expert Tips for Success
- Room Temperature Matters: Ensure your kitchen isn’t too hot when applying the chocolate drizzle, or it may bloom (turn greyish) instead of staying glossy.
- Parchment Paper is King: Caramel is incredibly sticky. Never place these directly on a plate or wire rack until the chocolate and caramel have fully set.
- Drizzle Technique: For that “handheld smartphone photo” look, move your hand quickly and fluidly back and forth. Small, hesitant movements result in thick clumps rather than elegant zig-zags.
- The “Ring” Hack: If you struggle to make the holes by hand, use a small circular fondant cutter to punch out the centers for meticulously detailed uniform shapes.
Storage, Reheating & Freezing
These No-Bake Samoa Cookies store exceptionally well because they don’t contain eggs or flour that can go stale quickly. Keep them in an airtight container at room temperature for up to 5 days. If your kitchen is warm, store them in the refrigerator to keep the dark chocolate layer from softening.
Freezing: You can freeze these cookies for up to 3 months! Place them in a single layer on a tray to flash-freeze, then transfer to a freezer-safe bag. This makes them a great make-ahead option alongside our No-Bake Christmas Cheesecake Bites.
What to Serve With This
These cookies are rich and decadent, so they pair best with something that offers a bit of contrast. A cold glass of milk is the classic choice, but a bitter espresso or a dark roast coffee perfectly complements the dark chocolate and sweet caramel. If you are hosting a party, serve these alongside a variety of textures, like our Brownie Cookies or a savory Whipped Feta Olive Dip for a complete spread.
Frequently Asked Questions
Yes! Use coconut-based condensed milk or vegan soft caramels and ensure your dark chocolate is dairy-free to make these completely plant-based.
While not strictly required for the structure, toasting provides the iconic golden-brown color and deep nutty flavor that defines a Samoa cookie. It is highly recommended.
Transfer your melted dark chocolate to a small piping bag or a Ziploc bag with a tiny corner snipped off. Use quick, sweeping arm movements for a professional look.
This usually happens if the caramel cooled too much or if there is too much coconut. Simply warm the mixture in the microwave for 10-15 seconds to make it sticky again.
The Complete No-Bake Samoa Cookies Recipe
No-Bake Samoa Cookies: The Ultimate Easy Caramel Coconut Copycat
Ingredients
Equipment
Method
- Toast coconut in the oven at 350°F (175°C) for 5-8 minutes or in a skillet until golden-brown.
- Melt caramels with cream in the microwave in 30-second bursts until smooth and amber-colored.
- Fold the toasted coconut and sea salt into the melted caramel until fully coated.
- Scoop 2 tablespoons of mixture, form into a thick ring on parchment paper, and let cool.
- Dip the bottom of each ring into melted dark chocolate and return to parchment.
- Drizzle the remaining dark chocolate in a zig-zag pattern over the tops of the cookies.
Notes
Use high-quality dark chocolate to balance the sweetness of the caramel.
Join the evay_eats Community!
We hope you love these No-Bake Samoa Cookies as much as we do! The combination of toasted golden-brown coconut and amber-colored caramel is truly a match made in heaven. If you make this recipe, please save it to your Pinterest board so you never lose it!
We want to see your results! Upload a photo of your cookies in the comments below, follow evay_eats for more viral dessert inspiration, and don’t forget to leave a 5-star rating if this became your new favorite no-bake treat!