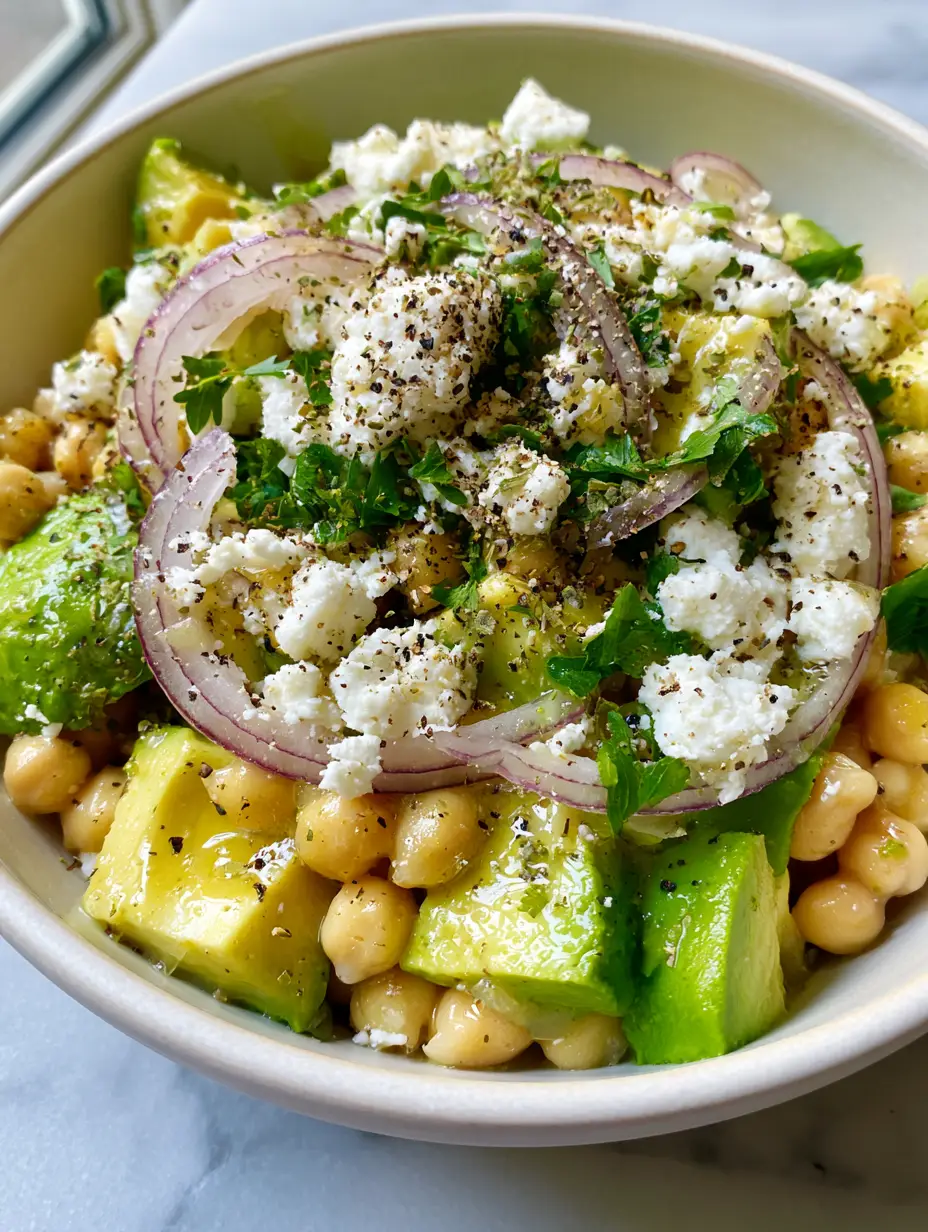
The chickpea feta avocado salad is more than just a quick lunch; it is a masterclass in contrasting textures and vibrant, sun-drenched flavors. When you are looking for a meal that requires zero actual cooking but delivers a professional, high-end result, this recipe stands as the gold standard. Imagine a bowl where buttery, ripe Hass avocado meets the salty tang of sheep milk feta, all bound together by a glossy, citrus-forward vinaigrette.
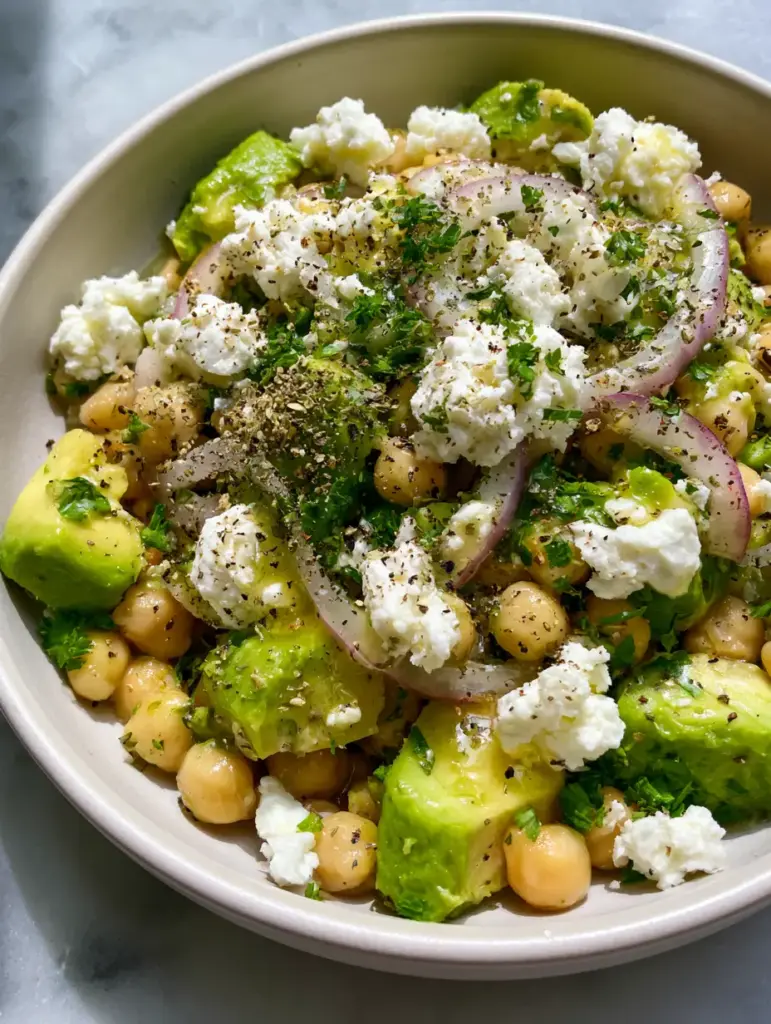
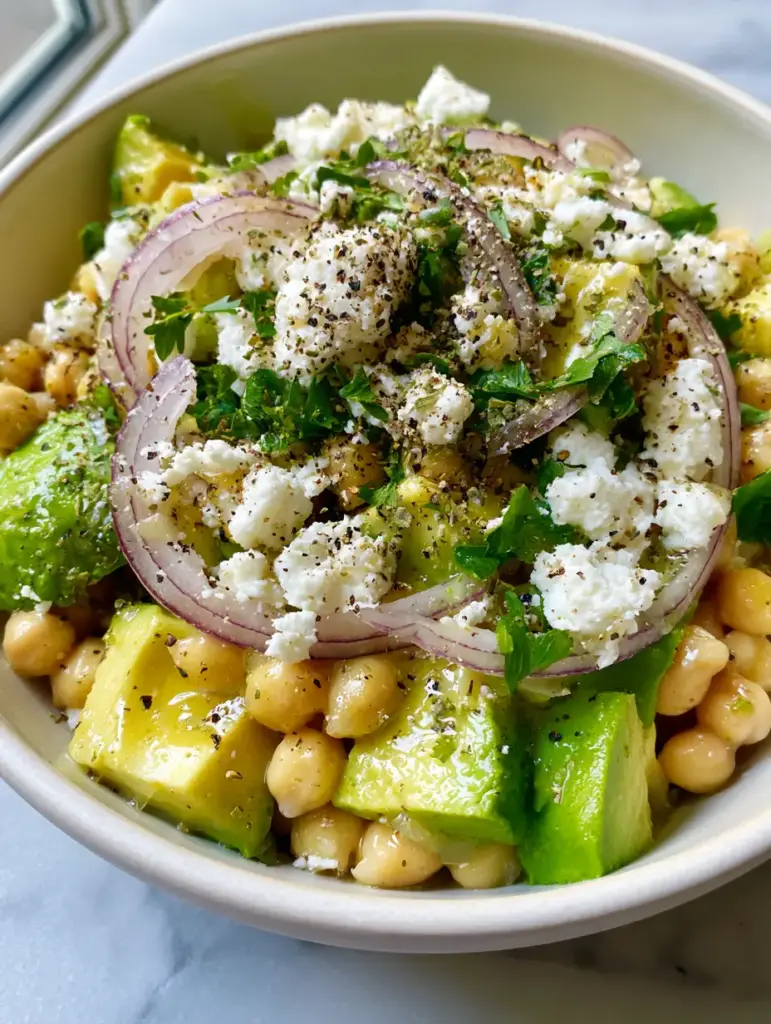
This particular salad has gained massive popularity for its “handheld smartphone photo” aesthetic—bright greens, golden chickpeas, and translucent red onions that catch the natural light perfectly. Whether you are prepping for a busy work week or looking for a stunning side dish for a summer gathering, this 10-minute wonder provides the perfect balance of plant-based protein and healthy fats. It is fresh, filling, and visually arresting.
In this guide, we will dive deep into the culinary science of creating a stable emulsion for your dressing and the specific techniques required to keep your avocado vibrant and your chickpeas perfectly textured. We are moving beyond the basic “throw it in a bowl” method to ensure every bite is seasoned to perfection.
Why This Vibrant Chickpea Feta Avocado Salad Works
- The Texture Trifecta: We combine the firm, “plump” bite of golden-beige chickpeas with the “buttery” softness of cubed avocado and the “snowy white” crumble of premium feta.
- Visual Sophistication: Using paper-thin, translucent arcs of red onion and emerald green Italian parsley ensures the dish looks like it was plucked from a professional food styling set.
- Nutrient Density: This salad is packed with fiber, heart-healthy monounsaturated fats, and essential minerals, making it as functional as it is delicious.
- Flavor Harmony: The acidity of the lemon herb vinaigrette cuts through the richness of the avocado and cheese, while the dried Mediterranean oregano provides an earthy, floral backbone.
The Essential Components for Culinary Success
To achieve the exact result described in our visual blueprint, you must select high-quality ingredients. Because there is no heat involved, the integrity of each component is paramount to the final flavor profile of your chickpea feta avocado salad.
The Protein: Canned Chickpeas (Garbanzo Beans)
We use one 15.5 oz (439g) can of chickpeas. It is critical to rinse them thoroughly under cold water to remove excess sodium and starches, then pat them completely dry with a clean kitchen towel to ensure the dressing clings to the surface rather than sliding off.
The Creamy Element: Ripe Hass Avocado
You will need 1 large (approx. 200g) Hass avocado. Look for one that yields slightly to gentle pressure; it should feel like the tip of your nose—firm enough to hold its “buttery cubes” shape, but soft enough to melt in your mouth.
The Salty Bite: Sheep Milk Feta
We recommend 1/2 cup (75g) of crumbled sheep milk feta. Sheep milk varieties are traditionally brine-aged and offer a sharper, creamier profile than cow’s milk alternatives, providing those “snowy white” highlights against the green avocado.
The Aromatics: Red Onion and Parsley
Use 1/4 of a medium red onion (approx. 30g), sliced into paper-thin, translucent arcs. For the herbs, 1/4 cup (10g) of fresh Italian parsley provides that “emerald green” pop and a clean, peppery finish.
The Liquid Gold: Lemon Herb Vinaigrette Emulsion
This is a blend of 3 tbsp (45ml) extra virgin olive oil, 2 tbsp (30ml) fresh lemon juice, and 1 tsp (5g) Dijon mustard. The mustard acts as a natural emulsifier, ensuring a “glossy, translucent” coating that catches the light in every photo.
The Finishing Touches: Oregano and Pepper
A heavy dusting of coarse cracked black pepper and 1/2 tsp (1g) of dried Mediterranean oregano are the final layers. These tiny flakes add visual texture and a deeply aromatic, savory finish that ties the Mediterranean theme together.
Professional Kitchen Tools for Precision
While this is a 10-minute recipe, using the right tools will elevate the final presentation of your chickpea feta avocado salad. Precision cutting and proper drying are the secrets to a non-soggy, café-quality bowl.
- A Sharp Chef’s Knife: Essential for dicing the avocado into clean cubes without bruising the flesh and for achieving those paper-thin red onion slices.
- Salad Spinner or Paper Towels: Use these to ensure the chickpeas are bone-dry before assembly.
- Small Glass Jar: Perfect for shaking your vinaigrette ingredients into a stable, glossy emulsion.
- Minimalist Ceramic Bowl: An off-white or light grey bowl provides the neutral backdrop needed to make the “vibrant” colors of the salad pop.
Step-By-Step: Assembling the Masterpiece
Preparing the Chickpea Base
Drain your canned chickpeas into a colander and rinse under cold running water for at least 30 seconds. Spread them onto a layer of paper towels and gently roll them around until they are matte and dry to the touch; this ensures the vinaigrette doesn’t become diluted.
Slicing the Aromatics
Using your sharpest knife, cut the red onion into the thinnest possible half-moons. If the onion flavor is too sharp for you, soak these arcs in ice water for 5 minutes, then pat dry. Finely chop the Italian parsley, ensuring you remove the thicker stems to keep the texture delicate.
Cubing the Avocado
Slice the avocado in half, remove the pit, and score the flesh into 1/2-inch cubes while still in the skin. Use a large spoon to scoop the “buttery cubes” out gently. Do this step last to prevent any enzymatic browning before the lemon juice can coat the surfaces.
Creating the Glossy Emulsion
In a small jar, combine the olive oil, lemon juice, mustard, a pinch of sea salt, and half of the dried oregano. Shake vigorously for 20 seconds until the mixture is opaque and “glossy.” This emulsion is what gives the salad its professional, light-catching sheen.
The Gentle Toss
Place the chickpeas and red onions in a large mixing bowl. Drizzle with 3/4 of the dressing and toss to coat. Add the avocado cubes and feta crumbles last, folding them in with a silicone spatula to prevent the avocado from mashing and the feta from turning into a paste. You want those distinct “snowy white” and “bright green” chunks visible.
Expert Culinary Secrets for the Perfect Salad
- The “Dry” Rule: If your chickpeas are wet, your dressing will slide to the bottom of the bowl. Dry chickpeas act like a sponge for the lemon herb flavors.
- Acid Management: If you are making this for a party, toss the avocado cubes in a teaspoon of lemon juice separately before adding them to the bowl to ensure they stay emerald green for hours.
- The Order of Operations: Never add the feta first. The friction of tossing the chickpeas will break the feta down into a greyish film. Add it at the very end as a topper.
- Seasoning Depth: Use “coarse” cracked black pepper rather than fine table pepper. The larger grains provide a textural crunch and a more intense floral heat.
How to Store and Prep Ahead
The chickpea feta avocado salad is best enjoyed within 30 minutes of assembly for peak “vibrant” color. However, you can meal prep the components effectively. Store the dried chickpeas, sliced onions, and chopped parsley in one container, and the vinaigrette in another.
Only slice and add the avocado and feta immediately before serving. If you have leftovers, store them in an airtight container for up to 24 hours. Note that the purple hue from the red onions may bleed slightly into the chickpeas, and the avocado will lose its bright luster, though it will still be safe to eat.
Perfect Pairings and Serving Ideas
This salad is remarkably versatile. It serves as a light, refreshing lunch on its own, but it also pairs beautifully with other Mediterranean-inspired dishes. For a full spread, consider serving it alongside a Mediterranean feta salad or a refreshing cucumber chickpea feta salad.
If you are hosting a summer barbecue, this salad provides a fresh contrast to heavier dishes like a summer pasta salad or a sweet-and-salty peach feta salad. For a protein boost, top the bowl with grilled chicken, seared shrimp, or a piece of flaky pan-fried salmon.
Frequently Asked Questions
Yes, but sheep milk feta is traditionally creamier and tangier. Cow’s milk feta is often saltier and drier, so you may need to adjust the added salt in the dressing.
No, canned chickpeas are already cooked. Simply rinse them thoroughly and dry them well to ensure the dressing adheres to the surface.
The lemon juice in the vinaigrette acts as an antioxidant. To ensure maximum freshness, toss the avocado cubes in a little extra lemon juice before folding them into the salad.
You can prep the chickpeas, onions, and dressing 2-3 days in advance. However, wait to add the avocado and feta until just before serving to maintain the best texture and color.
A sharp chef’s knife or a mandoline slicer set to the thinnest setting is ideal. Slicing them very thin ensures they provide flavor without overpowering the other ingredients.
The 10-Minute Chickpea Feta Avocado Salad Recipe
Chickpea Feta Avocado Salad: The Ultimate 10-Minute Mediterranean Bowl
Ingredients
Equipment
Method
- Rinse chickpeas thoroughly and pat dry with paper towels until no moisture remains.
- Slice red onion into paper-thin, translucent arcs and finely chop the parsley.
- Combine olive oil, lemon juice, mustard, and oregano in a jar; shake until glossy and thick.
- Combine chickpeas and onions with dressing. Gently fold in avocado cubes and feta crumbles.
- Top with chopped parsley and a heavy dusting of coarse cracked black pepper.
Notes
Use sheep milk feta for a creamier, more authentic Mediterranean flavor.
Closing & Call to Action
This chickpea feta avocado salad is a testament to the power of fresh ingredients and simple techniques. It proves that you don’t need a stove to create a meal that is nutritionally balanced, visually stunning, and restaurant-quality. The combination of creamy fats, sharp acid, and earthy herbs makes it a recipe you will return to week after week.
If you enjoyed this recipe, please leave a comment below and tell us how yours turned out! Don’t forget to take a photo of your vibrant bowl and share it with us on Pinterest. Your feedback helps our community grow and inspires more home cooks to get creative in the kitchen!