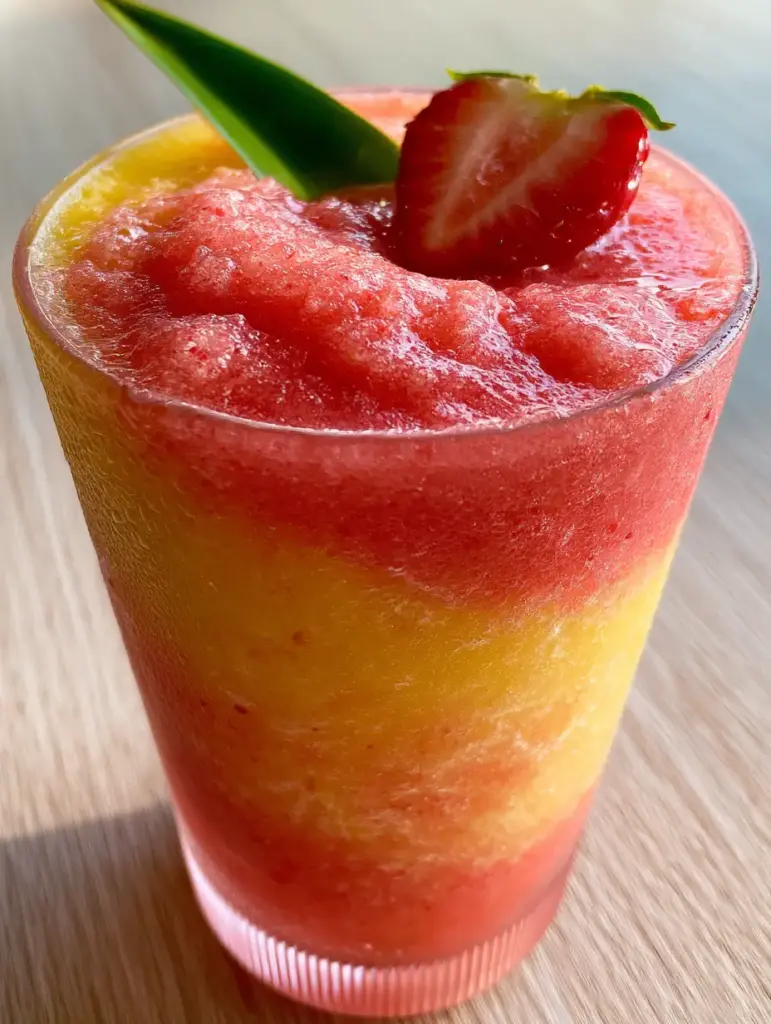
Pineapple strawberry slushies are the vibrant, frost-kissed answer to your summer cravings. Imagine a thick, whipped fruit puree that balances the tropical tang of sun-ripened pineapple with the nostalgic sweetness of garden-fresh strawberries. This isn’t your average watered-down icy drink; this is a dense, creamy, and meticulously swirled masterpiece that looks just as incredible as it tastes.
If you are scrolling through Pinterest looking for the perfect poolside companion, these pineapple strawberry slushies check every box. From the tiny frozen crystals that dance on your tongue to the fine beads of cold condensation clinging to a ribbed glass, this recipe is designed for maximum sensory satisfaction. Whether you’re hosting a backyard brunch or just need a 5-minute escape, this naturally sweet treat is the gold standard of frozen beverages.
Why You Will Crave These Swirled Pineapple Strawberry Slushies
- Ultra-Creamy Texture: Unlike traditional slushies that use crushed ice, this version relies on frozen fruit micro-textures to create a dense, matte finish that mimics soft-serve sorbet.
- No Added Sugars: By leveraging the natural Brix levels of frozen pineapple and strawberries, you get a decadent sweetness without the sugar crash.
- Pinterest-Perfect Aesthetics: The vibrant pink and yellow swirl creates a high-contrast visual that is guaranteed to stop the scroll.
- Hydration with a Twist: Using coconut water as the base adds electrolytes and a subtle tropical undertone that elevates the pineapple strawberry slushies to gourmet status.
If you enjoy this tropical profile, you might also love our vibrant Strawberry Mango Sangria or a classic Strawberry Piña Colada for your next gathering.
The Essential Components for a Thick Fruit Puree
To achieve the “visual recipe blueprint” of a dense, non-melting slushie, each ingredient serves a specific culinary purpose. We aren’t just blending fruit; we are engineering a frozen suspension.
The Tropical Base: Frozen Pineapple Chunks
You need 2 cups (300g) of frozen pineapple chunks. Pineapple contains fibers that, when pulverized at high speeds, create a velvety, whipped consistency. Ensure they are rock-solid frozen to maintain that matte, frozen finish without adding ice cubes.
The Berry Core: Frozen Whole Strawberries
Use 2 cups (280g) of frozen whole strawberries. These provide the deep, vibrant pink hue. Strawberries have a higher water content than pineapple, which helps the blender blades catch while maintaining a thick, slushy structure.
The Liquid Catalyst: Coconut Water or Pineapple Juice
You will need approximately 1/2 cup (120ml) to 3/4 cup (180ml) of liquid. Coconut water is preferred for its light, crisp finish, but pineapple juice can be used for a more intense flavor. Add this sparingly; too much liquid will turn your pineapple strawberry slushies into a juice rather than a thick puree.
The Final Touches: Fresh Garnishes
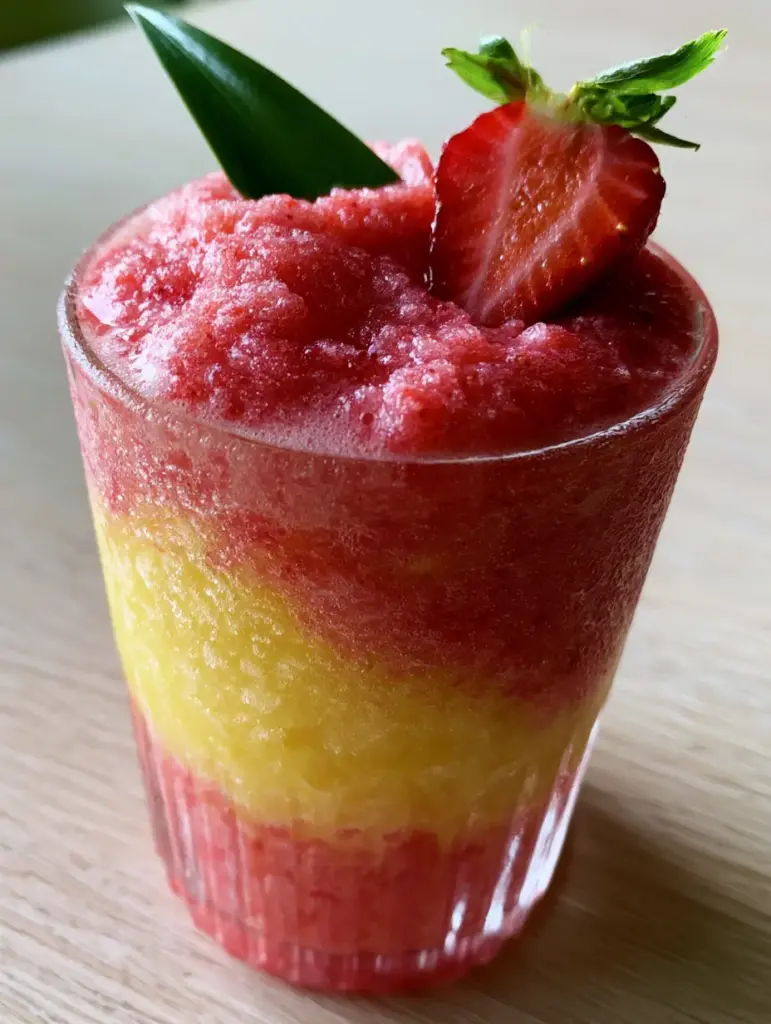
To match the professional aesthetic, prepare fresh strawberry halves and small green pineapple leaves. The contrast of the vibrant green against the pink and yellow swirl is what makes this recipe viral-ready.
Mastering the Swirl: Step-by-Step Instructions
Creating the perfect pineapple strawberry slushies requires a two-step blending process to ensure the colors stay distinct and vibrant rather than turning into a muddy brown.
Step 1: The Golden Pineapple Layer
Place your frozen pineapple chunks and 1/4 cup (60ml) of coconut water into a high-powered blender. Pulse on low, then gradually increase to high speed. Use a tamper to push the fruit into the blades. Process until you see a thick, vibrant yellow puree with visible fruit fibers but no large chunks. Transfer this to a chilled bowl and place it in the freezer immediately.
Step 2: The Radiant Strawberry Layer
Clean the blender pitcher quickly. Add the frozen strawberries and the remaining coconut water. Repeat the blending process. You are looking for a dense, frosty pink texture. It should be thick enough to hold its shape on a spoon, showing those tiny frozen crystals that signify a perfect slushie temperature.
Step 3: The Art of the Hand-Poured Swirl
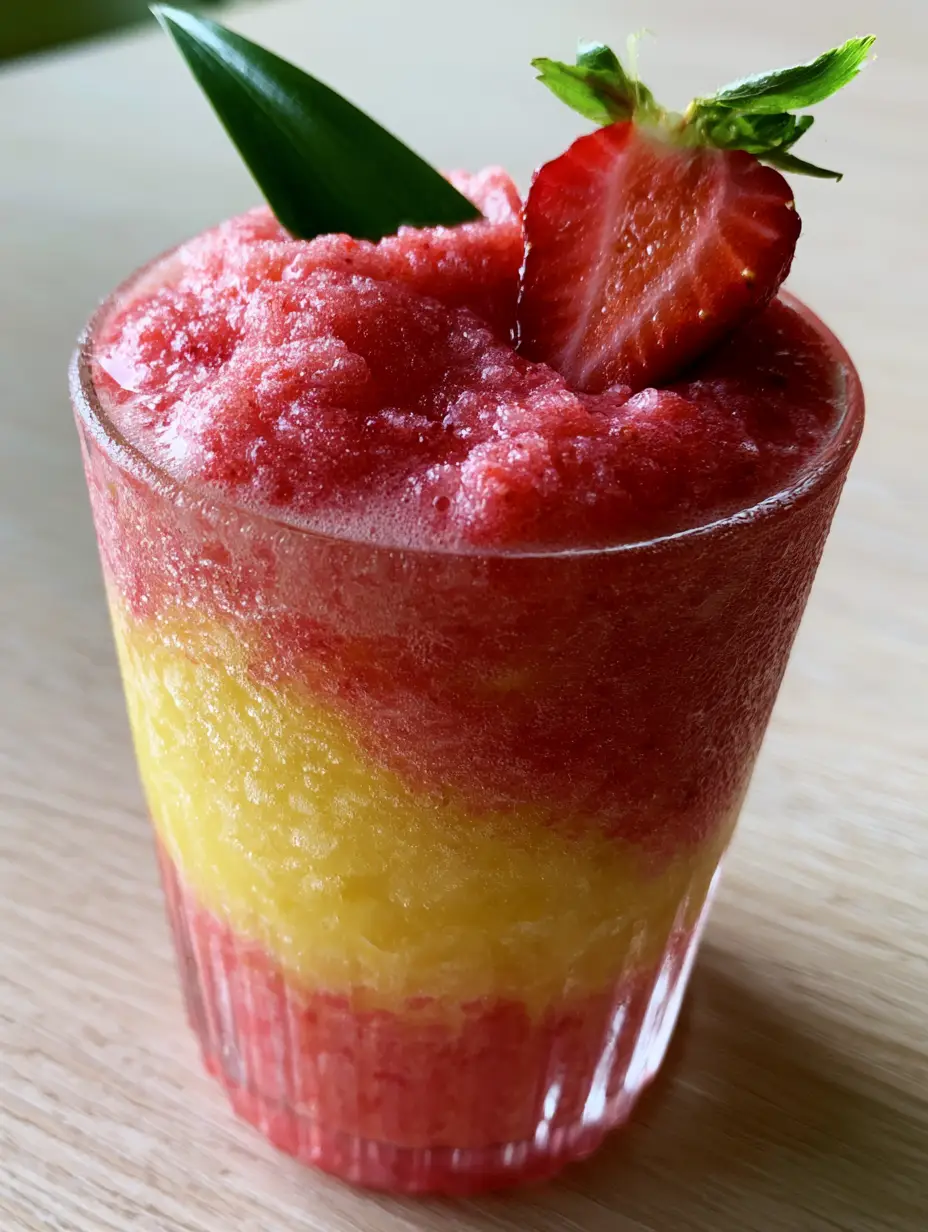
Take two tall, minimalist ribbed glasses. Using a spoon, alternate dollops of the yellow pineapple puree and the pink strawberry puree. Once the glass is nearly full, use a thin knife or a glass straw to gently swirl the layers together. Do not over-mix! You want distinct “ribbons” of color for that pineapple strawberry slushies signature look.
For more frozen inspiration, check out our Cherry Limeade Slushies or the refreshing Strawberry Lemonade Recipe.
Expert Tips for the Perfect Matte Frozen Finish
- Chill Your Glassware: Place your glasses in the freezer for at least 20 minutes before serving. This creates the fine beads of cold condensation on the outside of the glass, keeping the drink stable for longer.
- The “No Ice” Rule: Never add ice cubes to these pineapple strawberry slushies. Ice dilutes the flavor and creates a gritty texture. The frozen fruit itself is the ice.
- High-Speed Power: A standard blender may struggle with the low liquid ratio. If you don’t have a high-powered blender (like a Vitamix or Ninja), let the fruit sit on the counter for 5 minutes to slightly soften before blending.
- Garnish Technique: Place the fresh juicy halved strawberry on the rim and tuck the vibrant green pineapple leaf deep into the slushie so it stands upright.
Serving Suggestions & Pairings
These pineapple strawberry slushies are versatile enough to serve at a variety of occasions. Because of their thick, whipped texture, they pair beautifully with light, savory appetizers that cut through the fruit’s sweetness.
Serve them alongside a fresh Watermelon Feta Salad for a refreshing lunch, or pair them with Coconut Chicken Rice Bowls for a full tropical themed dinner. If you’re hosting a casual gathering, they are the perfect palate cleanser after enjoying a hearty Bacon Ranch Pasta Salad.
Storage and Make-Ahead Instructions
Can you make these in advance? While these are best served immediately to enjoy the frosty, dense texture, you can store leftovers. Pour the slushie mixture into a silicone muffin tin or ice cube trays and freeze. When ready to enjoy, simply pop the cubes back into the blender with a splash of liquid and re-blend.
Storage in the Fridge: Do not store these in the refrigerator, as they will melt into a juice within 30 minutes. To maintain the unmelted fruit micro-textures, the freezer is your only option.
Frequently Asked Questions
Yes, but you should let the frozen fruit thaw for about 5-10 minutes on the counter first to help a standard blender process the thick mixture without burning out the motor.
This recipe relies on the natural sweetness of ripe frozen fruit. However, if your fruit is tart, you can add 1 tablespoon of agave or honey to the blender.
Fresh fruit will result in a juice or a smoothie rather than a slushie. For the thick, matte, ‘spoonable’ texture, the fruit must be completely frozen.
To prevent melting, ensure you use 100% frozen fruit and chill your glassware in the freezer for 20 minutes before serving. Avoid adding room-temperature liquids.
The Best Pineapple Strawberry Slushies Recipe Card
Pineapple Strawberry Slushies: The Ultimate Creamy Swirled Fruit Refreshment
Ingredients
Equipment
Method
- Place frozen pineapple chunks and 1/4 cup coconut water in the blender.
- Blend until a thick, vibrant yellow puree forms. Remove and keep cold.
- Place frozen strawberries and remaining coconut water in the clean blender.
- Blend until a dense, frosty pink texture is achieved.
- Alternate dollops of yellow and pink puree into chilled glasses.
- Use a straw to gently swirl the colors, then garnish with fresh strawberry and pineapple leaf.
Notes
Chill your glasses beforehand to ensure the slushie stays frosty and creates condensation.
Join the Community!
Did these pineapple strawberry slushies brighten up your day? We want to see your gorgeous swirls! Save this recipe to your Favorite Drinks Board on Pinterest so you never lose it. Follow stacy_bites for more vibrant, fruit-forward recipes that taste as good as they look.
If you made this, please leave a 5-star rating in the recipe card below and upload a photo of your creation in the comments. Your feedback helps our community grow and inspires other home cooks to get creative in the kitchen!