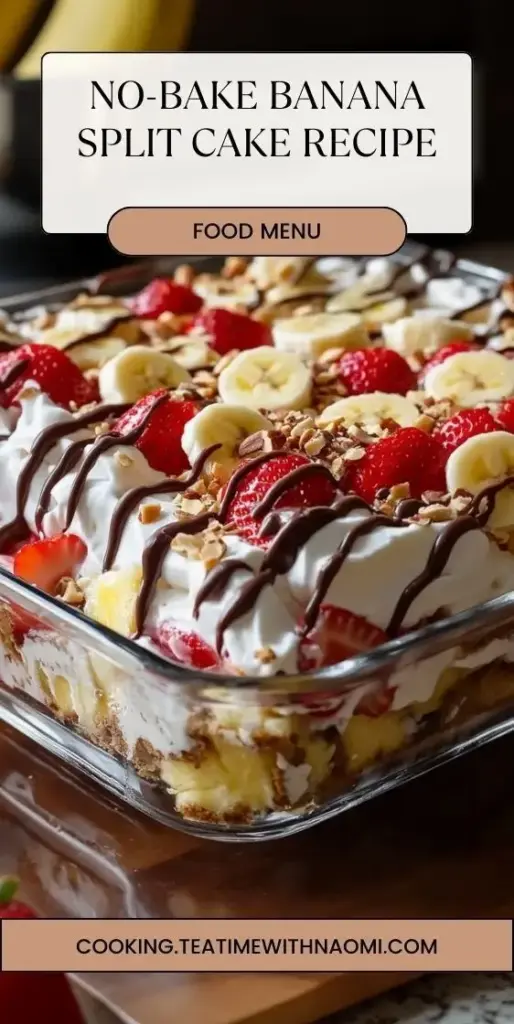
No-Bake Banana Split Cake is the quintessential crowd-pleasing dessert that combines the nostalgic flavors of an old-fashioned ice cream parlor with the effortless convenience of a refrigerator cake. If you are looking for a dessert that looks like a professional masterpiece but requires zero time in a hot oven, this multi-layered beauty is your answer. With its buttery graham cracker crust, velvety cream cheese filling, and vibrant fruit layers, it is a visual and culinary triumph.
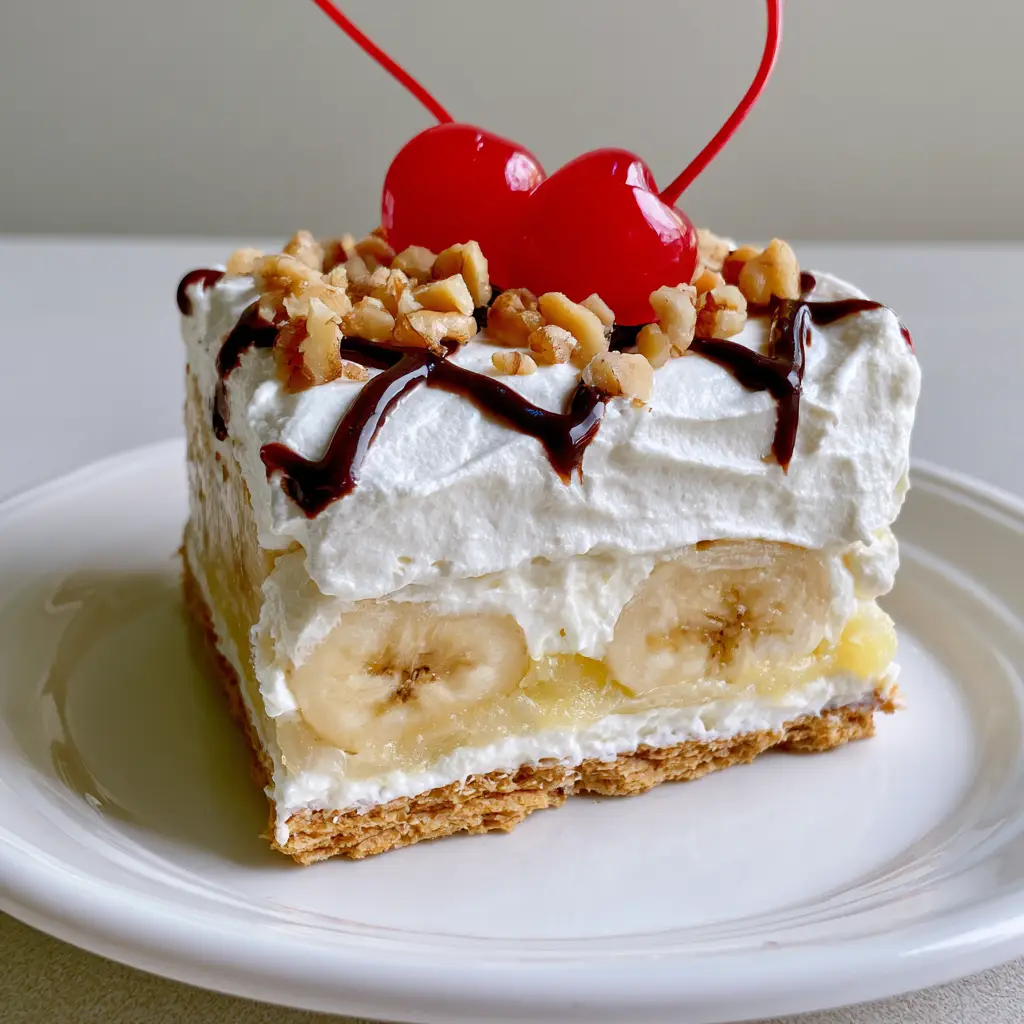
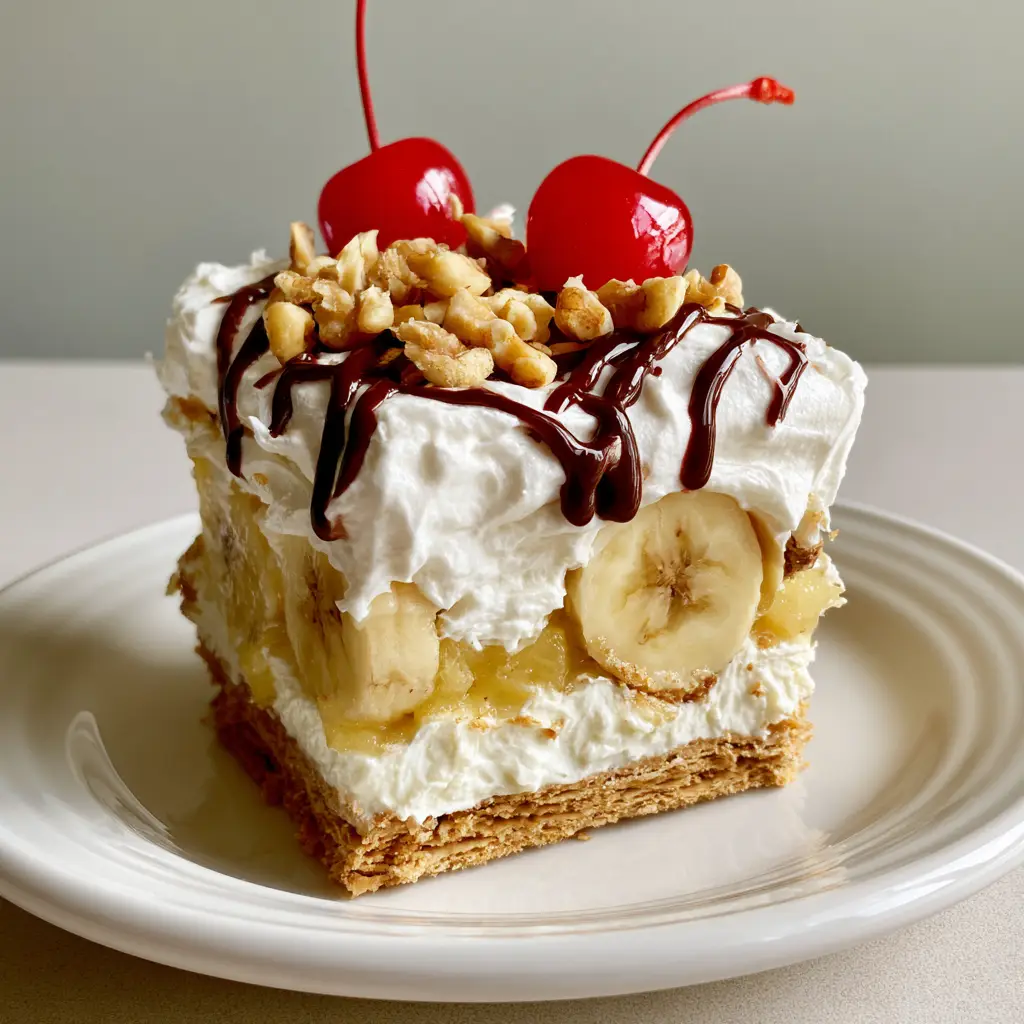
This specific No-Bake Banana Split Cake recipe is designed to be the centerpiece of your next gathering. Imagine a thick, handheld square slice sitting perfectly on a white ceramic plate, showcasing distinct, colorful layers that promise a different texture in every bite. Whether you are hosting a backyard BBQ or just craving a cool treat, this recipe delivers a creamy, fruity, and crunchy experience that is impossible to resist. It is as much a feast for the eyes as it is for the palate.
Why This No-Bake Banana Split Cake Recipe Works
- Zero Oven Time: Perfect for hot summer days when you want a decadent treat without heating up the entire kitchen.
- Textural Contrast: You get the crunch of walnuts, the snap of a chilled crust, and the silkiness of whipped cream in one forkful.
- Visually Stunning: The distinct layers of white cream, yellow pineapple, and bright red maraschino cherries make it a Pinterest-viral sensation.
- Make-Ahead Friendly: This cake actually improves as it sets, making it the perfect stress-free dessert for entertaining.
If you love layered desserts that don’t require baking, you should also check out our no-bake Oreo lasagna for a chocolatey twist on this construction method. Much like our hummingbird cake, this recipe leans into the tropical fusion of banana and pineapple, but with a much lighter, airy finish.
The Essential Ingredients for Success
Graham Cracker Crumbs: 2 cups (160g) of finely crushed crumbs provide the structural foundation. Their honey-sweet profile complements the fruit perfectly.
Unsalted Butter: 1/2 cup (113g) of melted butter acts as the “glue” for your crust. Using unsalted allows you to control the sodium levels in the base.
Cream Cheese: 16 oz (450g) of full-fat brick cream cheese. This provides the tangy, smooth white layer that balances the sweetness of the fruit.
Powdered Sugar: 2 cups (240g) to sweeten the cream cheese layer while maintaining a silky, grit-free texture.
Crushed Pineapple: 20 oz (567g) can, drained extremely well. This provides a thin layer of pale yellow acidity that cuts through the rich cream.
Fresh Bananas: 3-4 large bananas, sliced into uniform circular rounds. These are the star of the show and provide natural creaminess.
Whipped Topping: 8 oz (225g) of airy, stabilized whipped cream. This creates the thick, cloud-like top layer seen in the visual blueprint.
Garnish Components: You will need dark chocolate syrup for the crisscross drizzle, 1/2 cup (60g) of finely chopped tan walnuts, and glossy bright red maraschino cherries with stems.
Step-by-Step Instructions to a Perfect Slice
Step 1: Constructing the Golden Foundation
In a medium bowl, combine your 2 cups (160g) of graham cracker crumbs with the 1/2 cup (113g) of melted butter. Stir until the mixture resembles wet sand. Press this mixture firmly into the bottom of a 9×13 inch glass dish. Use the bottom of a measuring cup to ensure the crust is compact and even, which prevents crumbling when sliced.
Chill the crust in the freezer for 10-15 minutes while you prepare the filling. This “flash chill” helps the butter solidify, creating a sturdy base for the heavy layers to follow.
Step 2: The Velvety Cream Cheese Layer
In a large mixing bowl, beat the 16 oz (450g) of softened cream cheese with the 2 cups (240g) of powdered sugar. Use a hand mixer or stand mixer on medium-high speed until the mixture is completely smooth and aerated. There should be no visible lumps.
Spread this thick, white mixture over the chilled graham cracker crust. Use an offset spatula to smooth it all the way to the edges, creating a waterproof barrier for the fruit layers above. This is the “glue” that keeps the No-Bake Banana Split Cake together.
Step 3: Precision Fruit Layering
Arrange your fresh circular banana slices in a single, tight layer over the cream cheese. Ensure the bananas are ripe but firm to avoid a “mushy” texture. Next, take your well-drained crushed pineapple and spread it in a thin, even layer over the bananas. The pale yellow hue should just peek through.
Pro-Tip: If your pineapple is too wet, it will release juices that make the crust soggy. Squeeze the pineapple through a fine-mesh sieve or cheesecloth until it is quite dry before adding it to the cake.
Step 4: The Airy Whipped Topping
Gently dollop your whipped topping over the pineapple layer. Using a clean spatula, spread it into a thick, airy layer of white cream. You want to maintain the volume, so avoid pressing down too hard. The goal is a light, cloud-like finish that provides the “vertical height” essential for a great mouthfeel.
Step 5: Iconic Banana Split Garnishes
Now, bring the No-Bake Banana Split Cake to life. Using a spoon or a squeeze bottle, create a crisscross drizzle of dark chocolate syrup across the top. Sprinkle the 1/2 cup (60g) of finely chopped walnuts evenly over the surface. Finally, place your bright red maraschino cherries—complete with stems—strategically so that each square slice will feature two cherries.
Expert Tips for the Perfect Pinterest Slice
- The 4-Hour Rule: This cake must chill for at least 4 hours, though overnight is better. This allows the graham cracker crust to soften slightly into a cake-like consistency while the cream cheese layers firm up.
- Clean Slices: For those perfect square slices shown in the handheld photo, wipe your knife with a warm, damp cloth between every single cut.
- Anti-Browning Bananas: If you are worried about bananas turning brown, toss the slices in a tablespoon of lemon juice before layering. However, being sealed under the cream and pineapple usually prevents oxidation.
- Nut Alternatives: If you have a nut allergy, toasted coconut flakes offer a similar crunch and visual appeal to the chopped walnuts.
For more layered inspirations that utilize unique fruit textures, explore our raspberry cream angel food cake or the classic neapolitan layer cake.
Storage and Freezing Guidelines
Keep your No-Bake Banana Split Cake refrigerated at all times when not serving. Because of the fresh bananas and dairy, it is best consumed within 2-3 days. Cover the dish tightly with plastic wrap or a lid to prevent the whipped cream from absorbing “fridge smells.”
We do not recommend freezing this cake. The cellular structure of the bananas and the pineapple changes upon thawing, which can lead to a watery mess. This is a dessert meant to be enjoyed fresh and chilled!
What to Serve With This Dessert
Since this is a rich, multi-layered treat, it pairs beautifully with light, savory appetizers. Consider serving it after a meal of mexican street corn or a light vegetable-forward dish like our roasted vegetable bake. The coolness of the cream cheese filling provides a refreshing palate cleanser after savory, spiced foods.
Frequently Asked Questions
Absolutely. Toasted pecans, peanuts, or even toasted shredded coconut are excellent substitutes that provide that essential visual texture and crunch.
Yes, but you must stabilize it. Beat heavy cream with powdered sugar and a bit of gelatin or cream cheese to ensure the layer doesn’t collapse under the weight of the garnishes.
No! By mixing the crumbs with melted butter and chilling them in the freezer, the crust sets firmly without any heat, maintaining the ‘no-bake’ integrity of the recipe.
The most important step is to drain your crushed pineapple thoroughly. Use a fine-mesh sieve and press down with a spoon, or squeeze the fruit through a cheesecloth to remove all excess juice.
It is best served within 24-48 hours. After two days, the bananas may begin to soften significantly and the crust can become overly moist from the fruit juices.
The Ultimate No-Bake Banana Split Cake Recipe Card
No-Bake Banana Split Cake: The Ultimate Layered Summer Dessert
Ingredients
Equipment
Method
- Combine graham cracker crumbs and melted butter until wet sand consistency.
- Press firmly into a 9x13 dish and freeze for 15 minutes to set.
- Beat cream cheese and powdered sugar until smooth; spread over the crust.
- Layer banana slices followed by the well-drained crushed pineapple.
- Spread whipped topping into a thick, airy layer over the pineapple.
- Drizzle with chocolate, sprinkle with walnuts, and top with cherries.
- Refrigerate for at least 4 hours before slicing into squares.
Notes
Wipe the knife blade between cuts for clean, professional-looking squares.
Save This Recipe to Pinterest!
If you loved this No-Bake Banana Split Cake, don’t let the recipe get lost in the scroll! Hover over any of the images in this post and click the “Save” button to add it to your Dessert Recipes or Summer Treats board on Pinterest.
Follow evay_eats for more high-visual, easy-to-follow recipes that guarantee success in the kitchen. If you make this cake, please come back and leave a 5-star rating and a comment below—we love seeing your handheld slice photos! Happy “non-baking”!